Laser - 90W CO2 Laser Cutter
More Laser 28 Jun 2014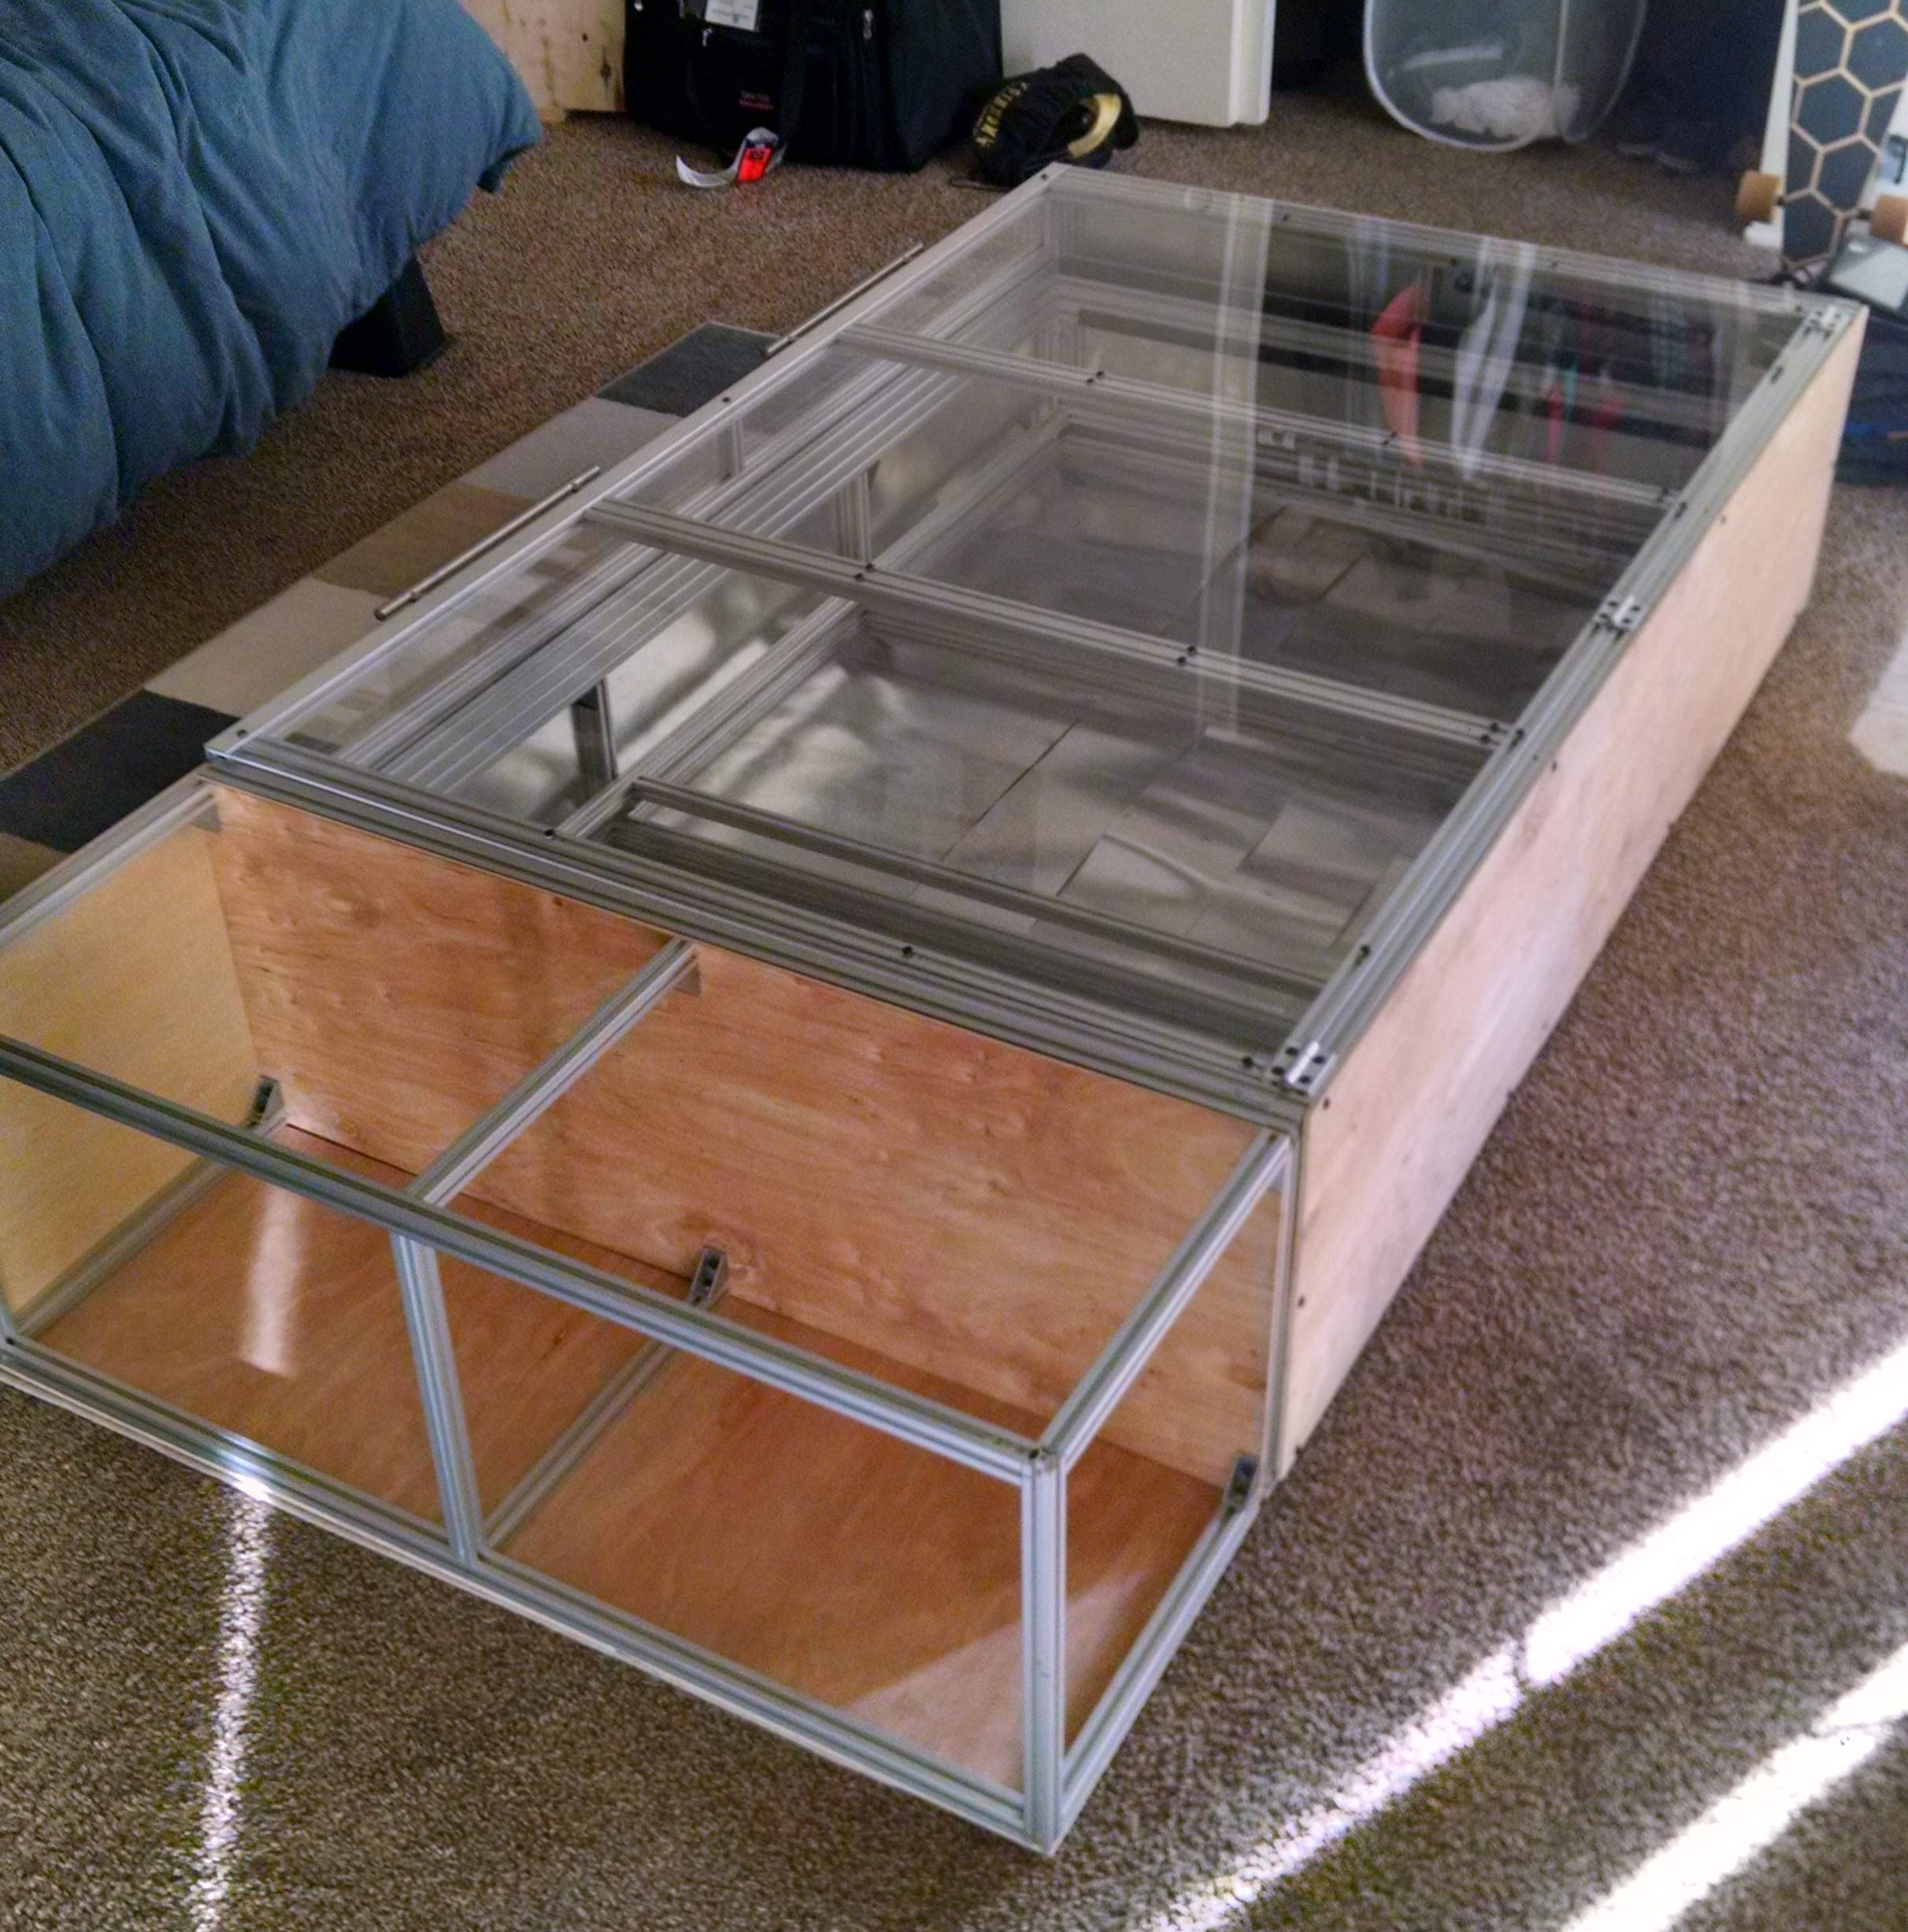
My biggest and craziest project so far! A 90 watt CO2 laser cutter with a 2 by 4 ft work area driven by a smoothieboard and steppers. This is going to be a rapid fire post to get my website log of the project up to date, and then I’ll start with more regular and less intense updates.
I started with the design in Solidworks. The frame is built of Misumi aluminum HFS5 extrusions. HFS5 I believe designates the slot size or something. They come in a variety of combinations based on a 20 by 20 mm square, as in 2020, 2040, 4040, even 2080. I used 2020 mostly, with some 2040 and 2080 for rigidity or assembly in some places. The design uses core screws, which basically means tapping the end hole of the extrusions with an M5 thread, and then screwing a M5 button head into the hole, which fits perfectly in the slot of another extrusion. Then an access hole is drilled through the second extrusion to allow the screw to be tightened.
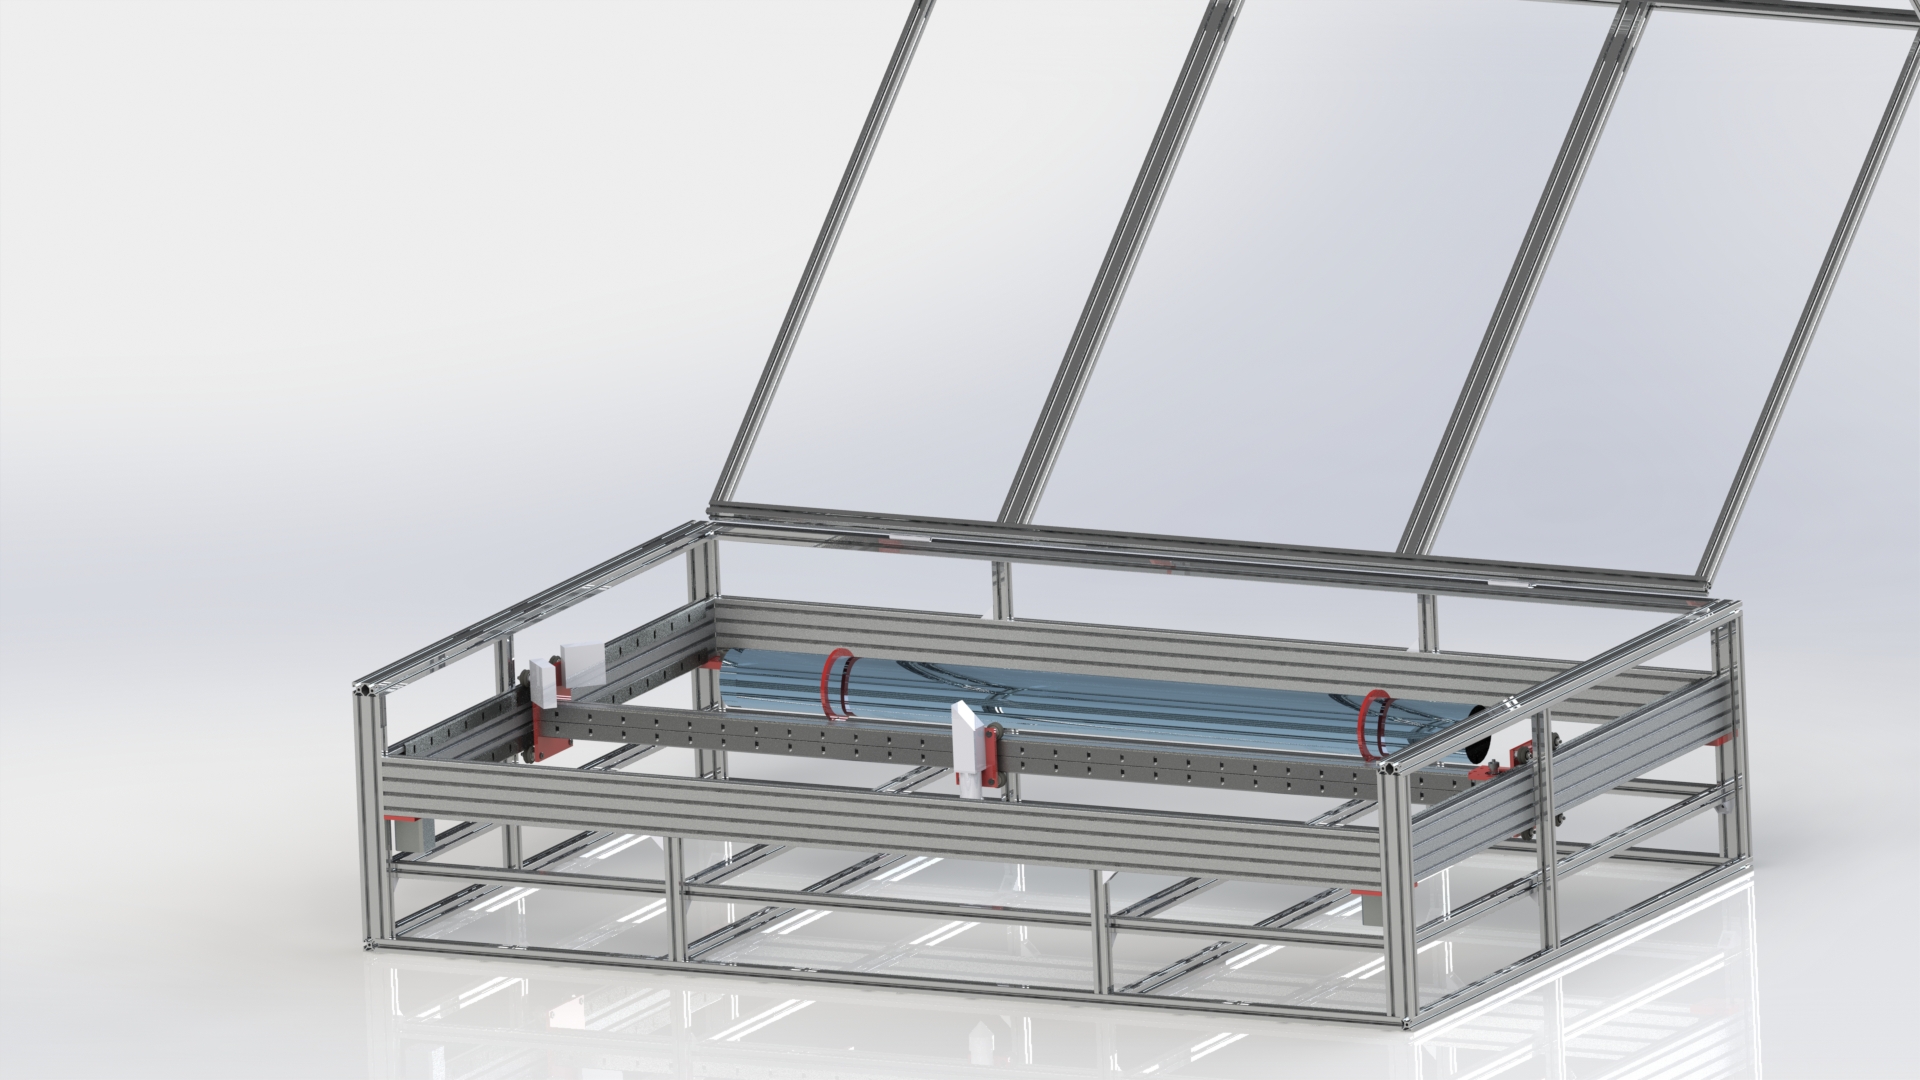
The design is based on and very similar to the Lasersaur, but in this rendering the laser is on the x gantry. I thought I’d do this to gain a little more work area, eliminate some mirrors, and shorten the optical path but that turned out to be silly. The work area savings was on the order of 50 to 60 mm between mounting it on the back and mounting it on the gantry. The longest part of the optical path is the x axis, since the y is only half as long. It also doesn’t eliminate any mirrors, since the beam must be “turned around” before going to the moving head.
The penalties of having the tube on the gantry however are pretty massive. Turns out a 4 ish foot long glass tube is relatively heavy and quite fragile. Add to that that cooling water lines have to be run to the tube while its moving, and it seems like a silly idea. Speed would definitely suffer for the not very significant advantages listed above. With a 90w laser, I want to be able to move pretty quick to use more of my power capacity.
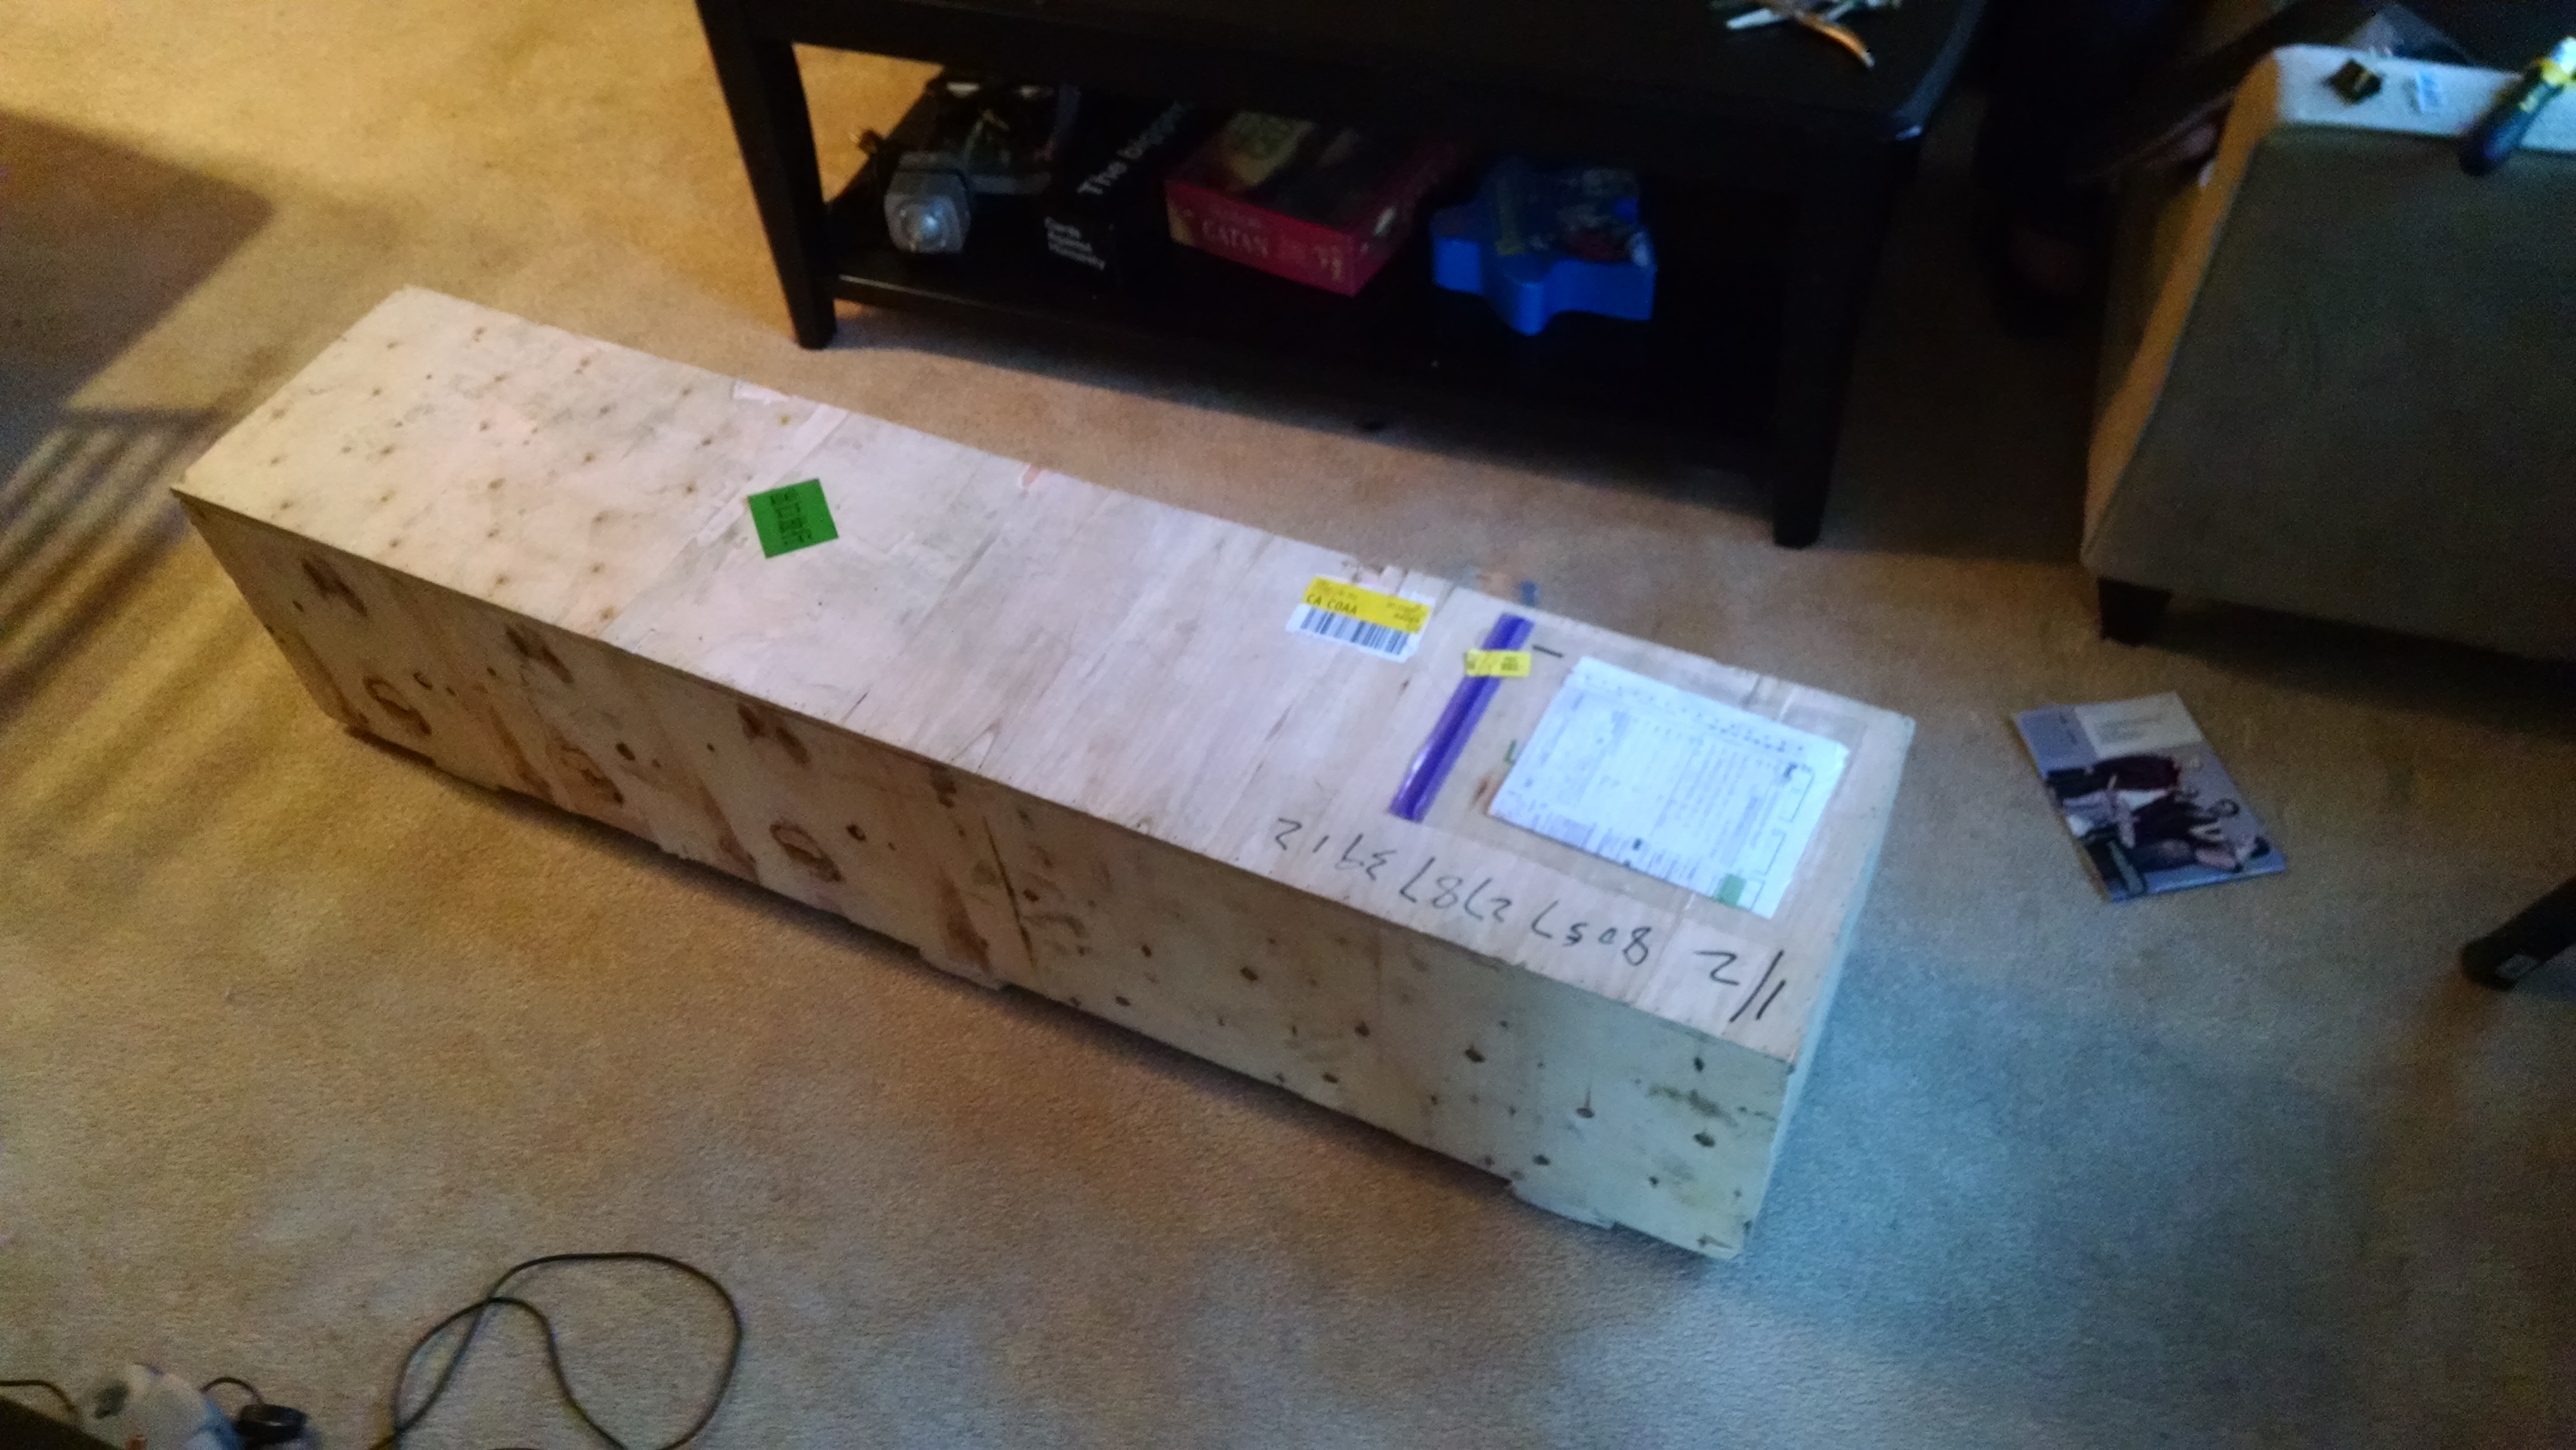
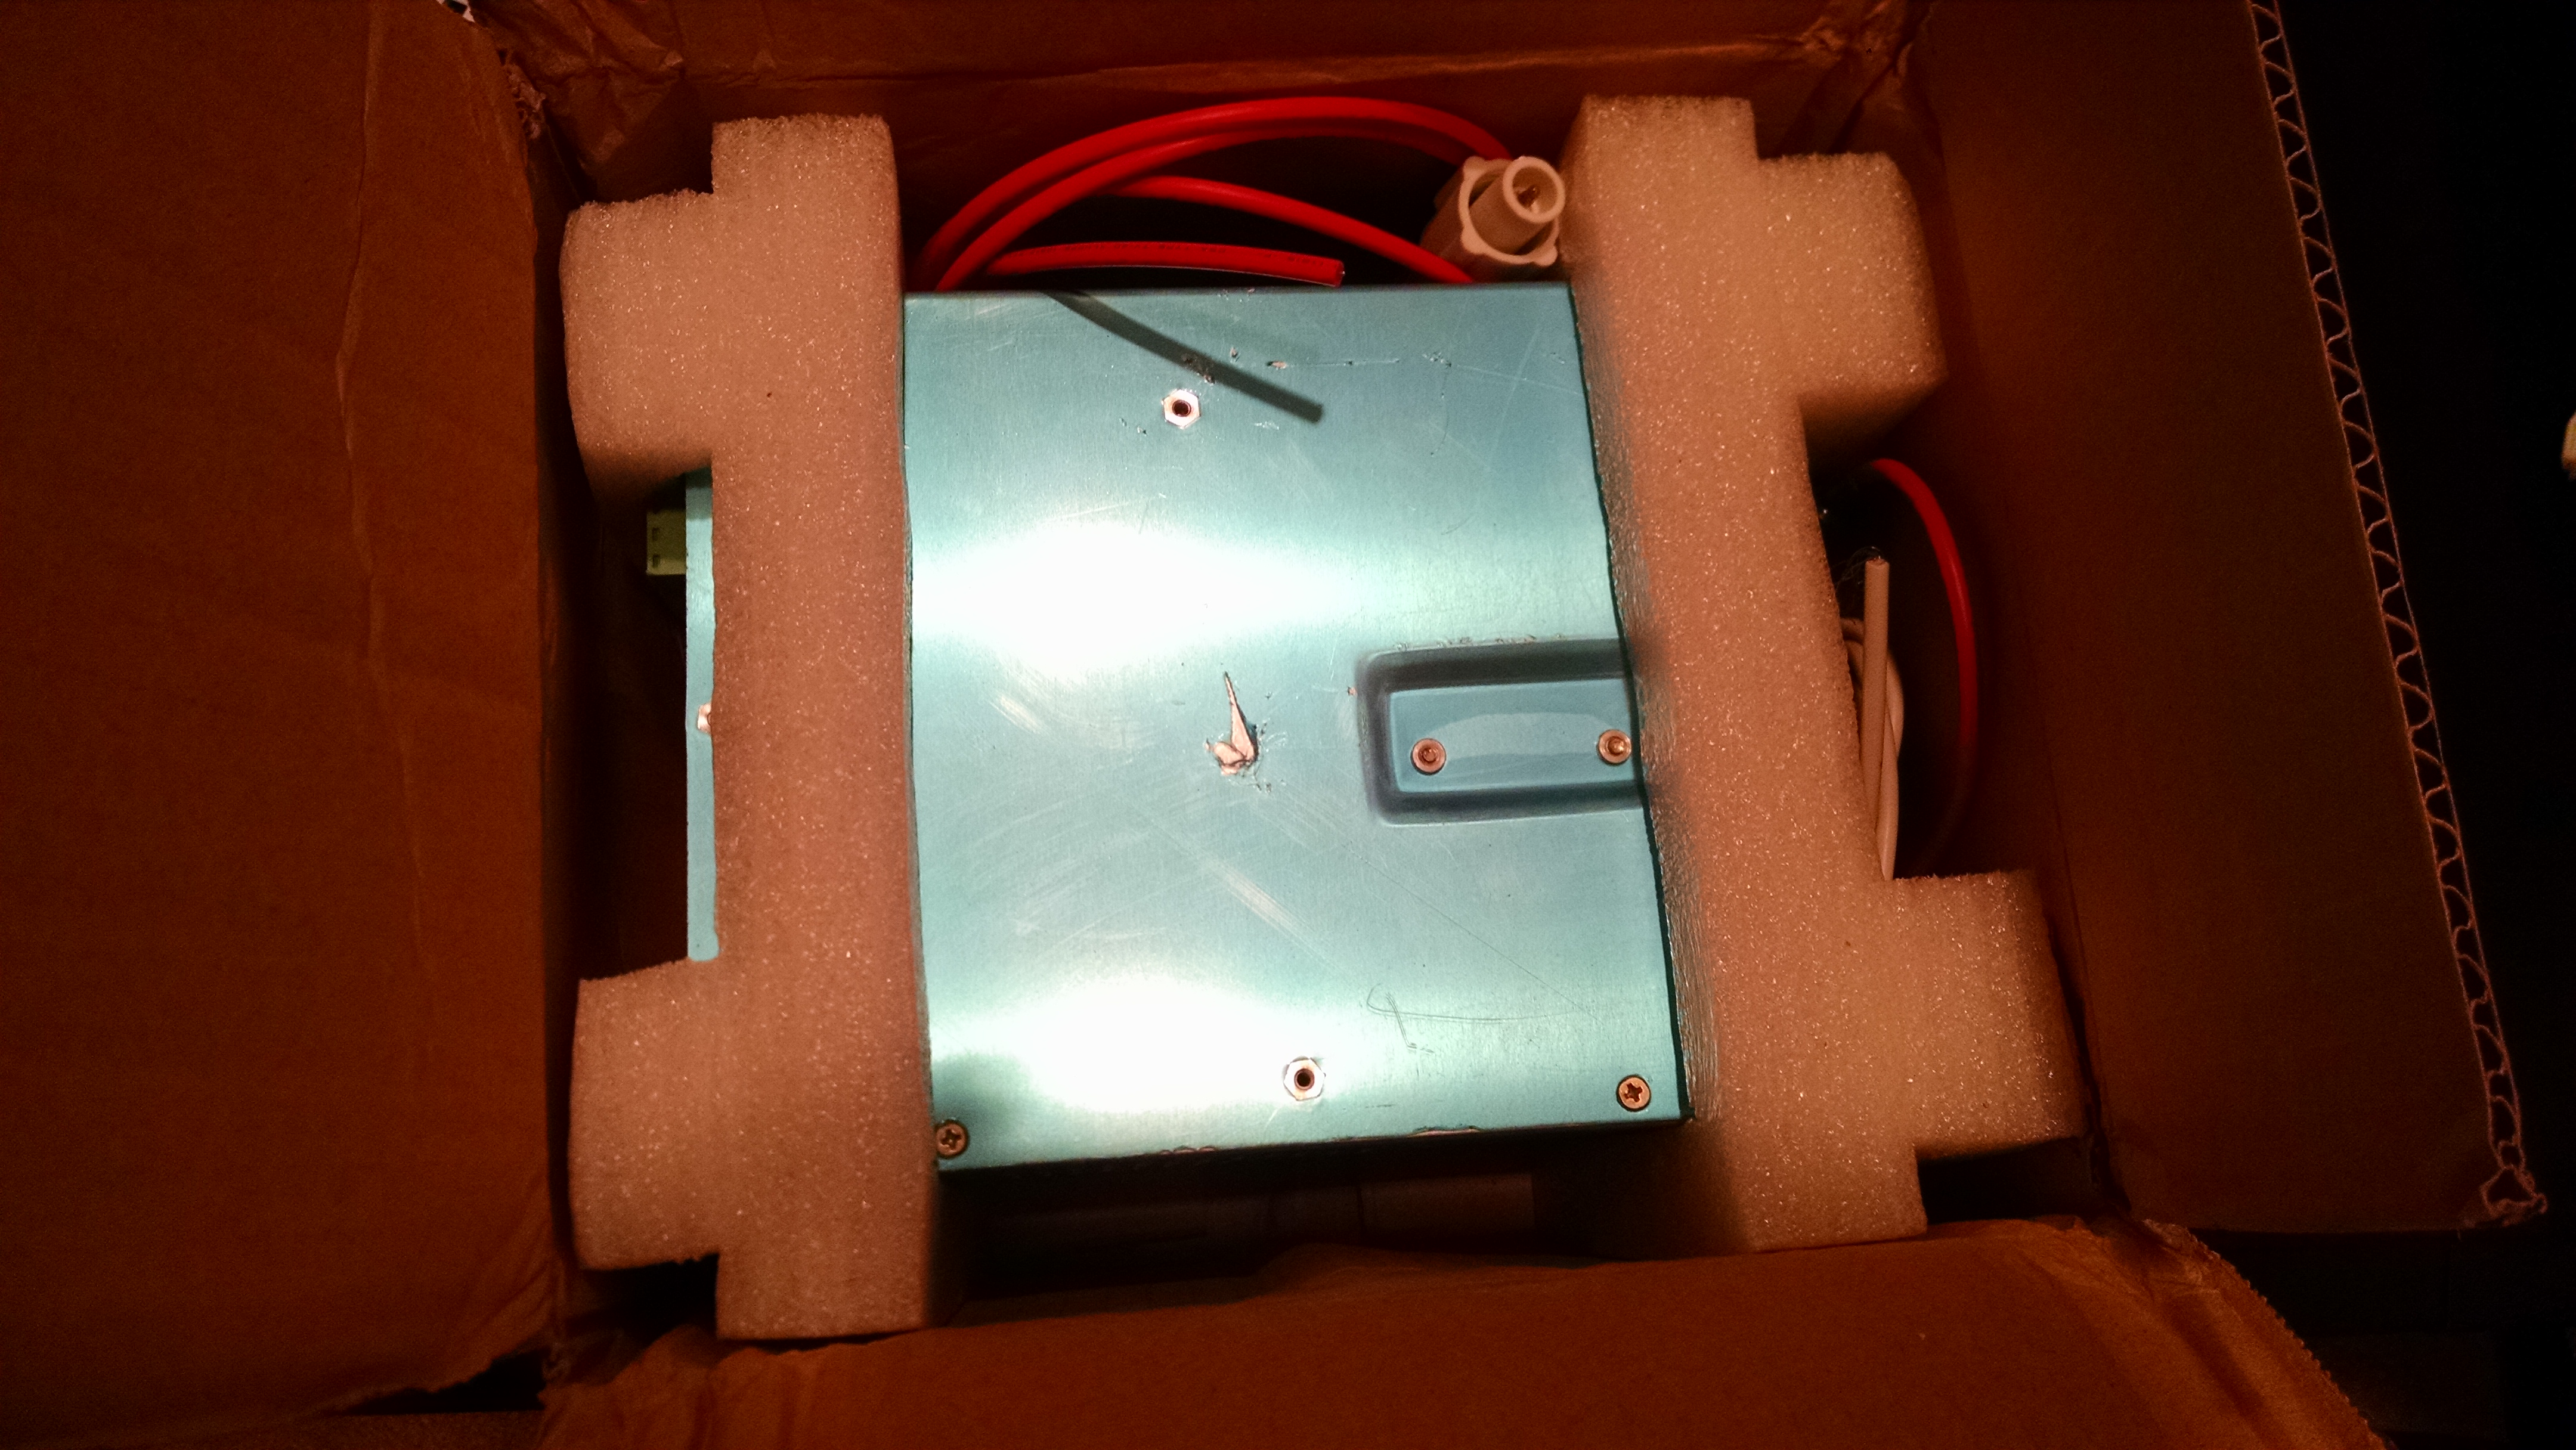
Here’s the tube as it arrived. I bought it on Ebay from China. The manufacturer is Reci. My tube was excellently packaged as you can see below. The crate is also surprisingly light, just unweildy.
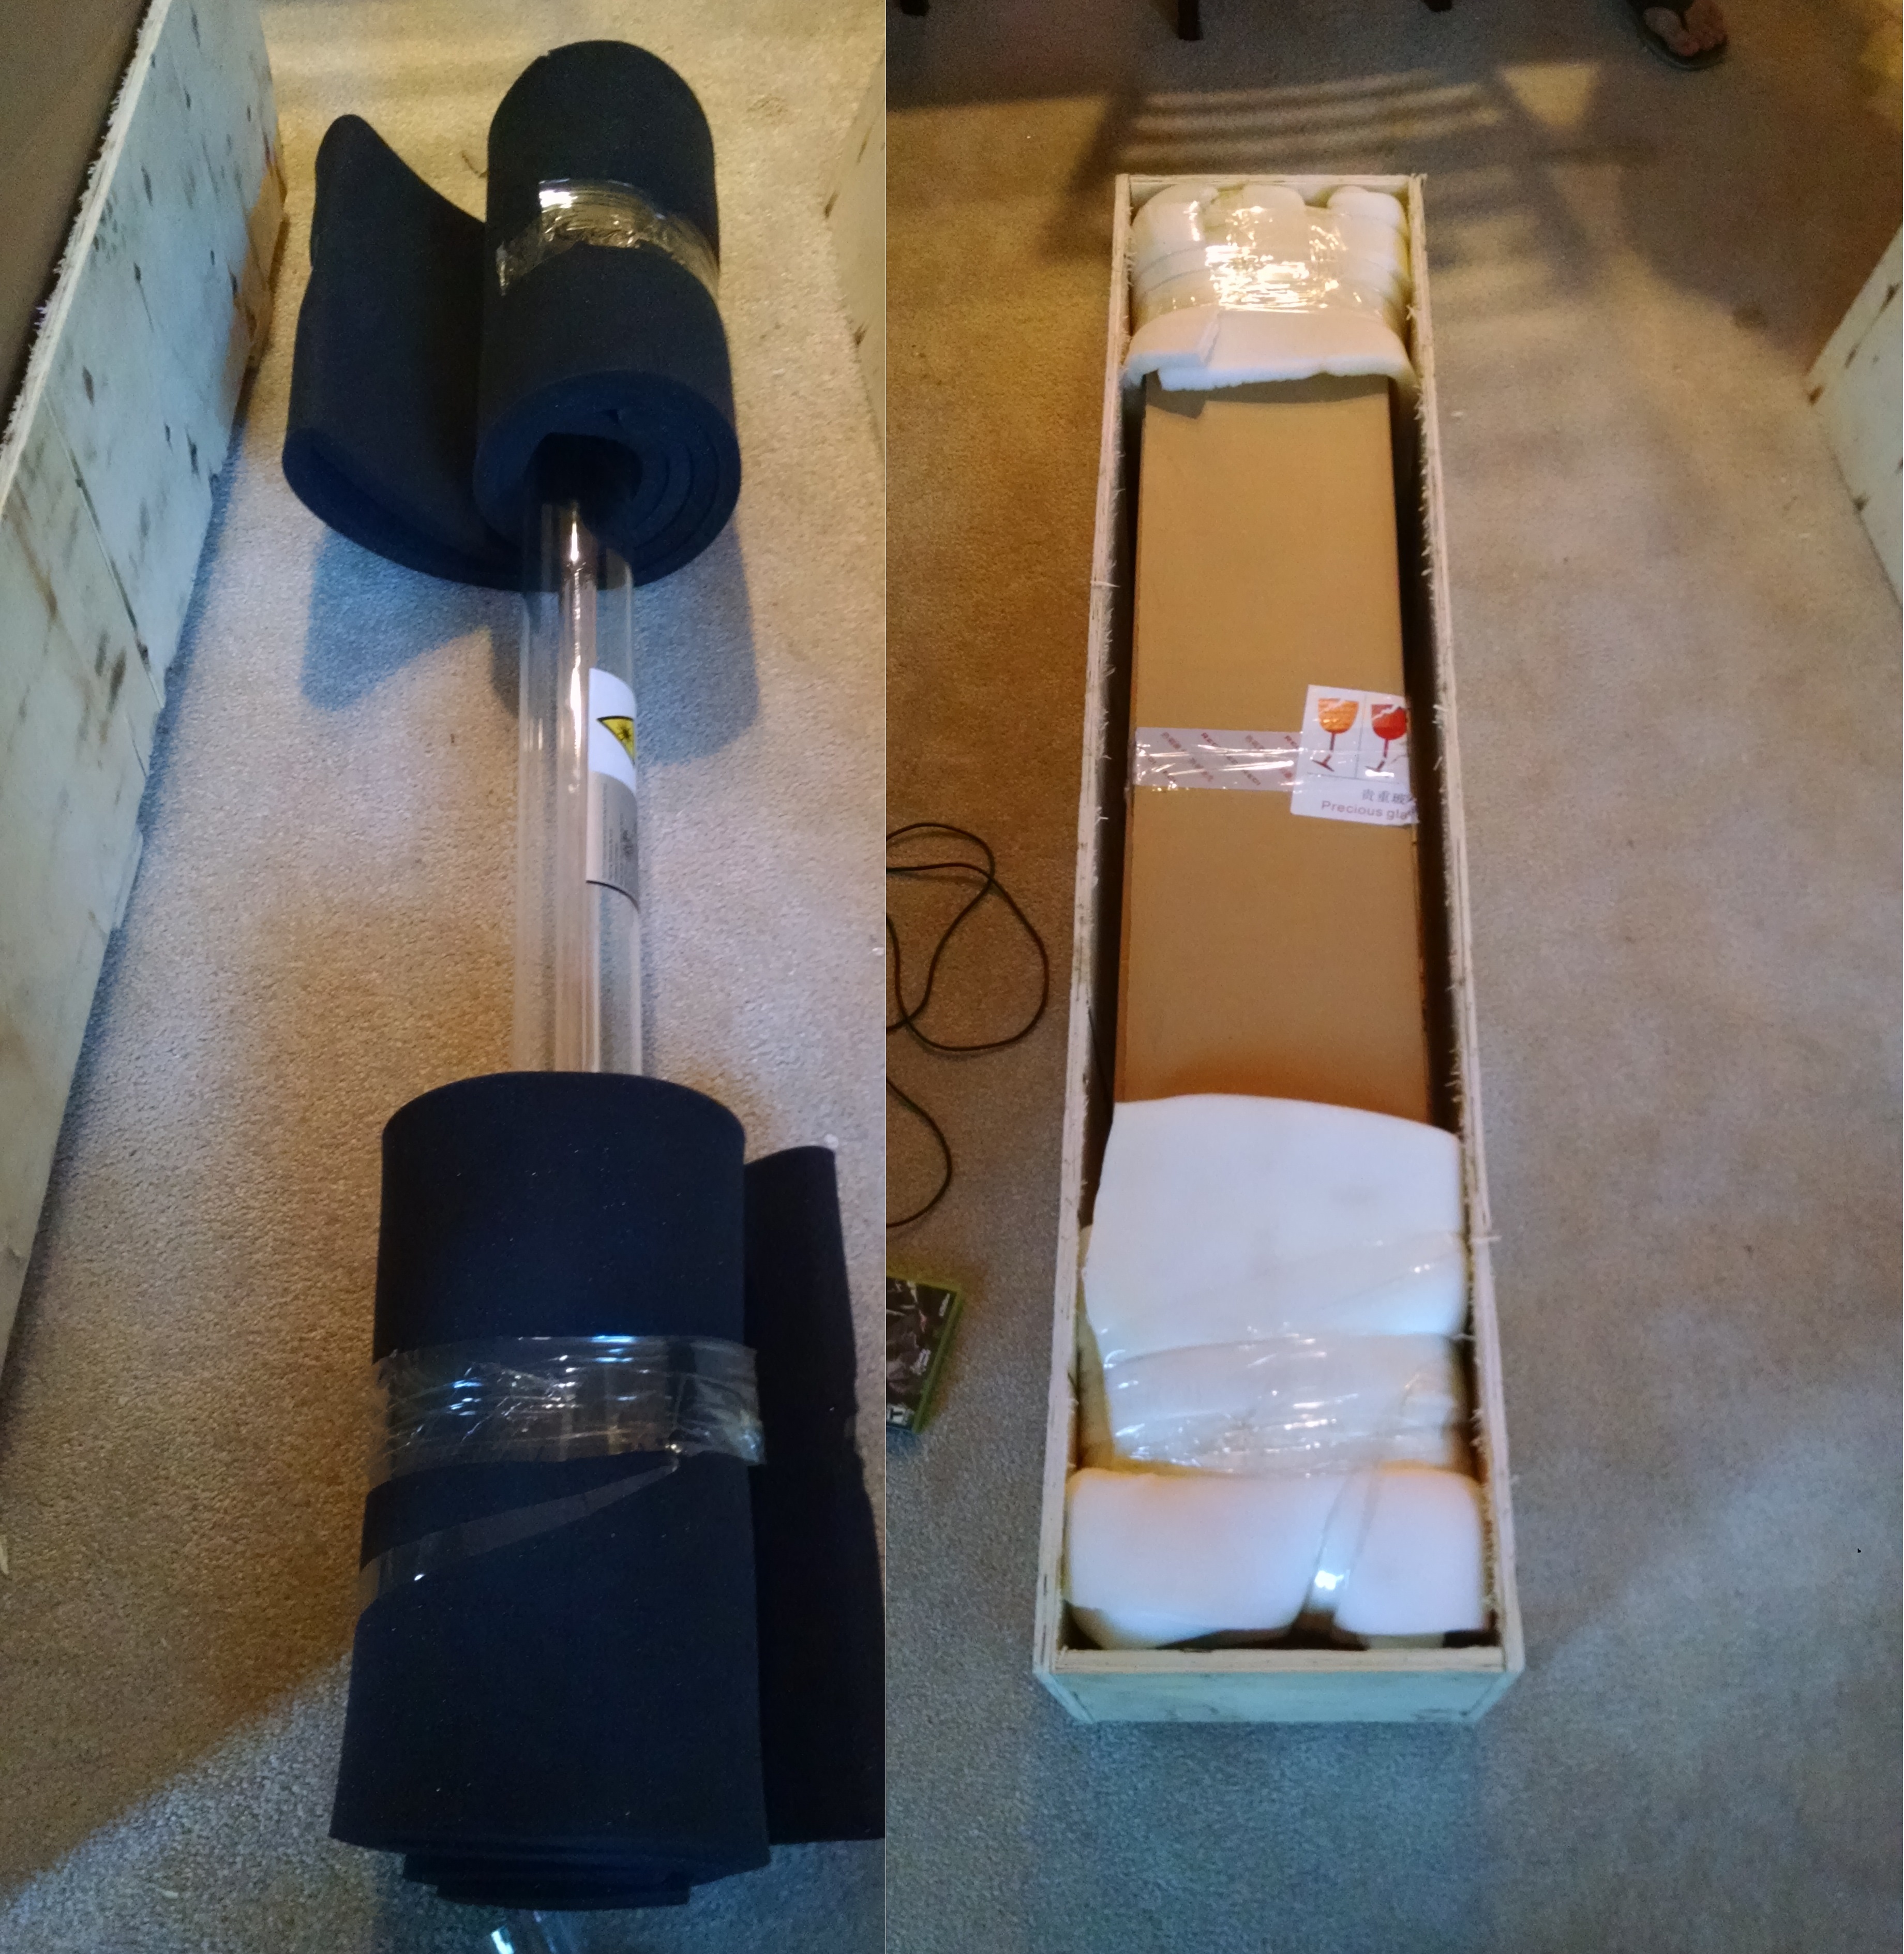
Inside the crate was some foam, and another box. Inside that box was more foam with the laser resting in it. Pretty beautiful packing job, and should allay anyone’s fears of ordering a tube shipped from overseas.
Here’s the 90w supply I purchased at the same time. Documentation on it is a little lacking, as you’d expect from a shady Ebay laser PSU. It has multiple laser enable pins, so it can be enabled by the smootieboard, as well as being cut off by a door interlock or key switch or something like that. I think I’ll hook it to the door interlock.
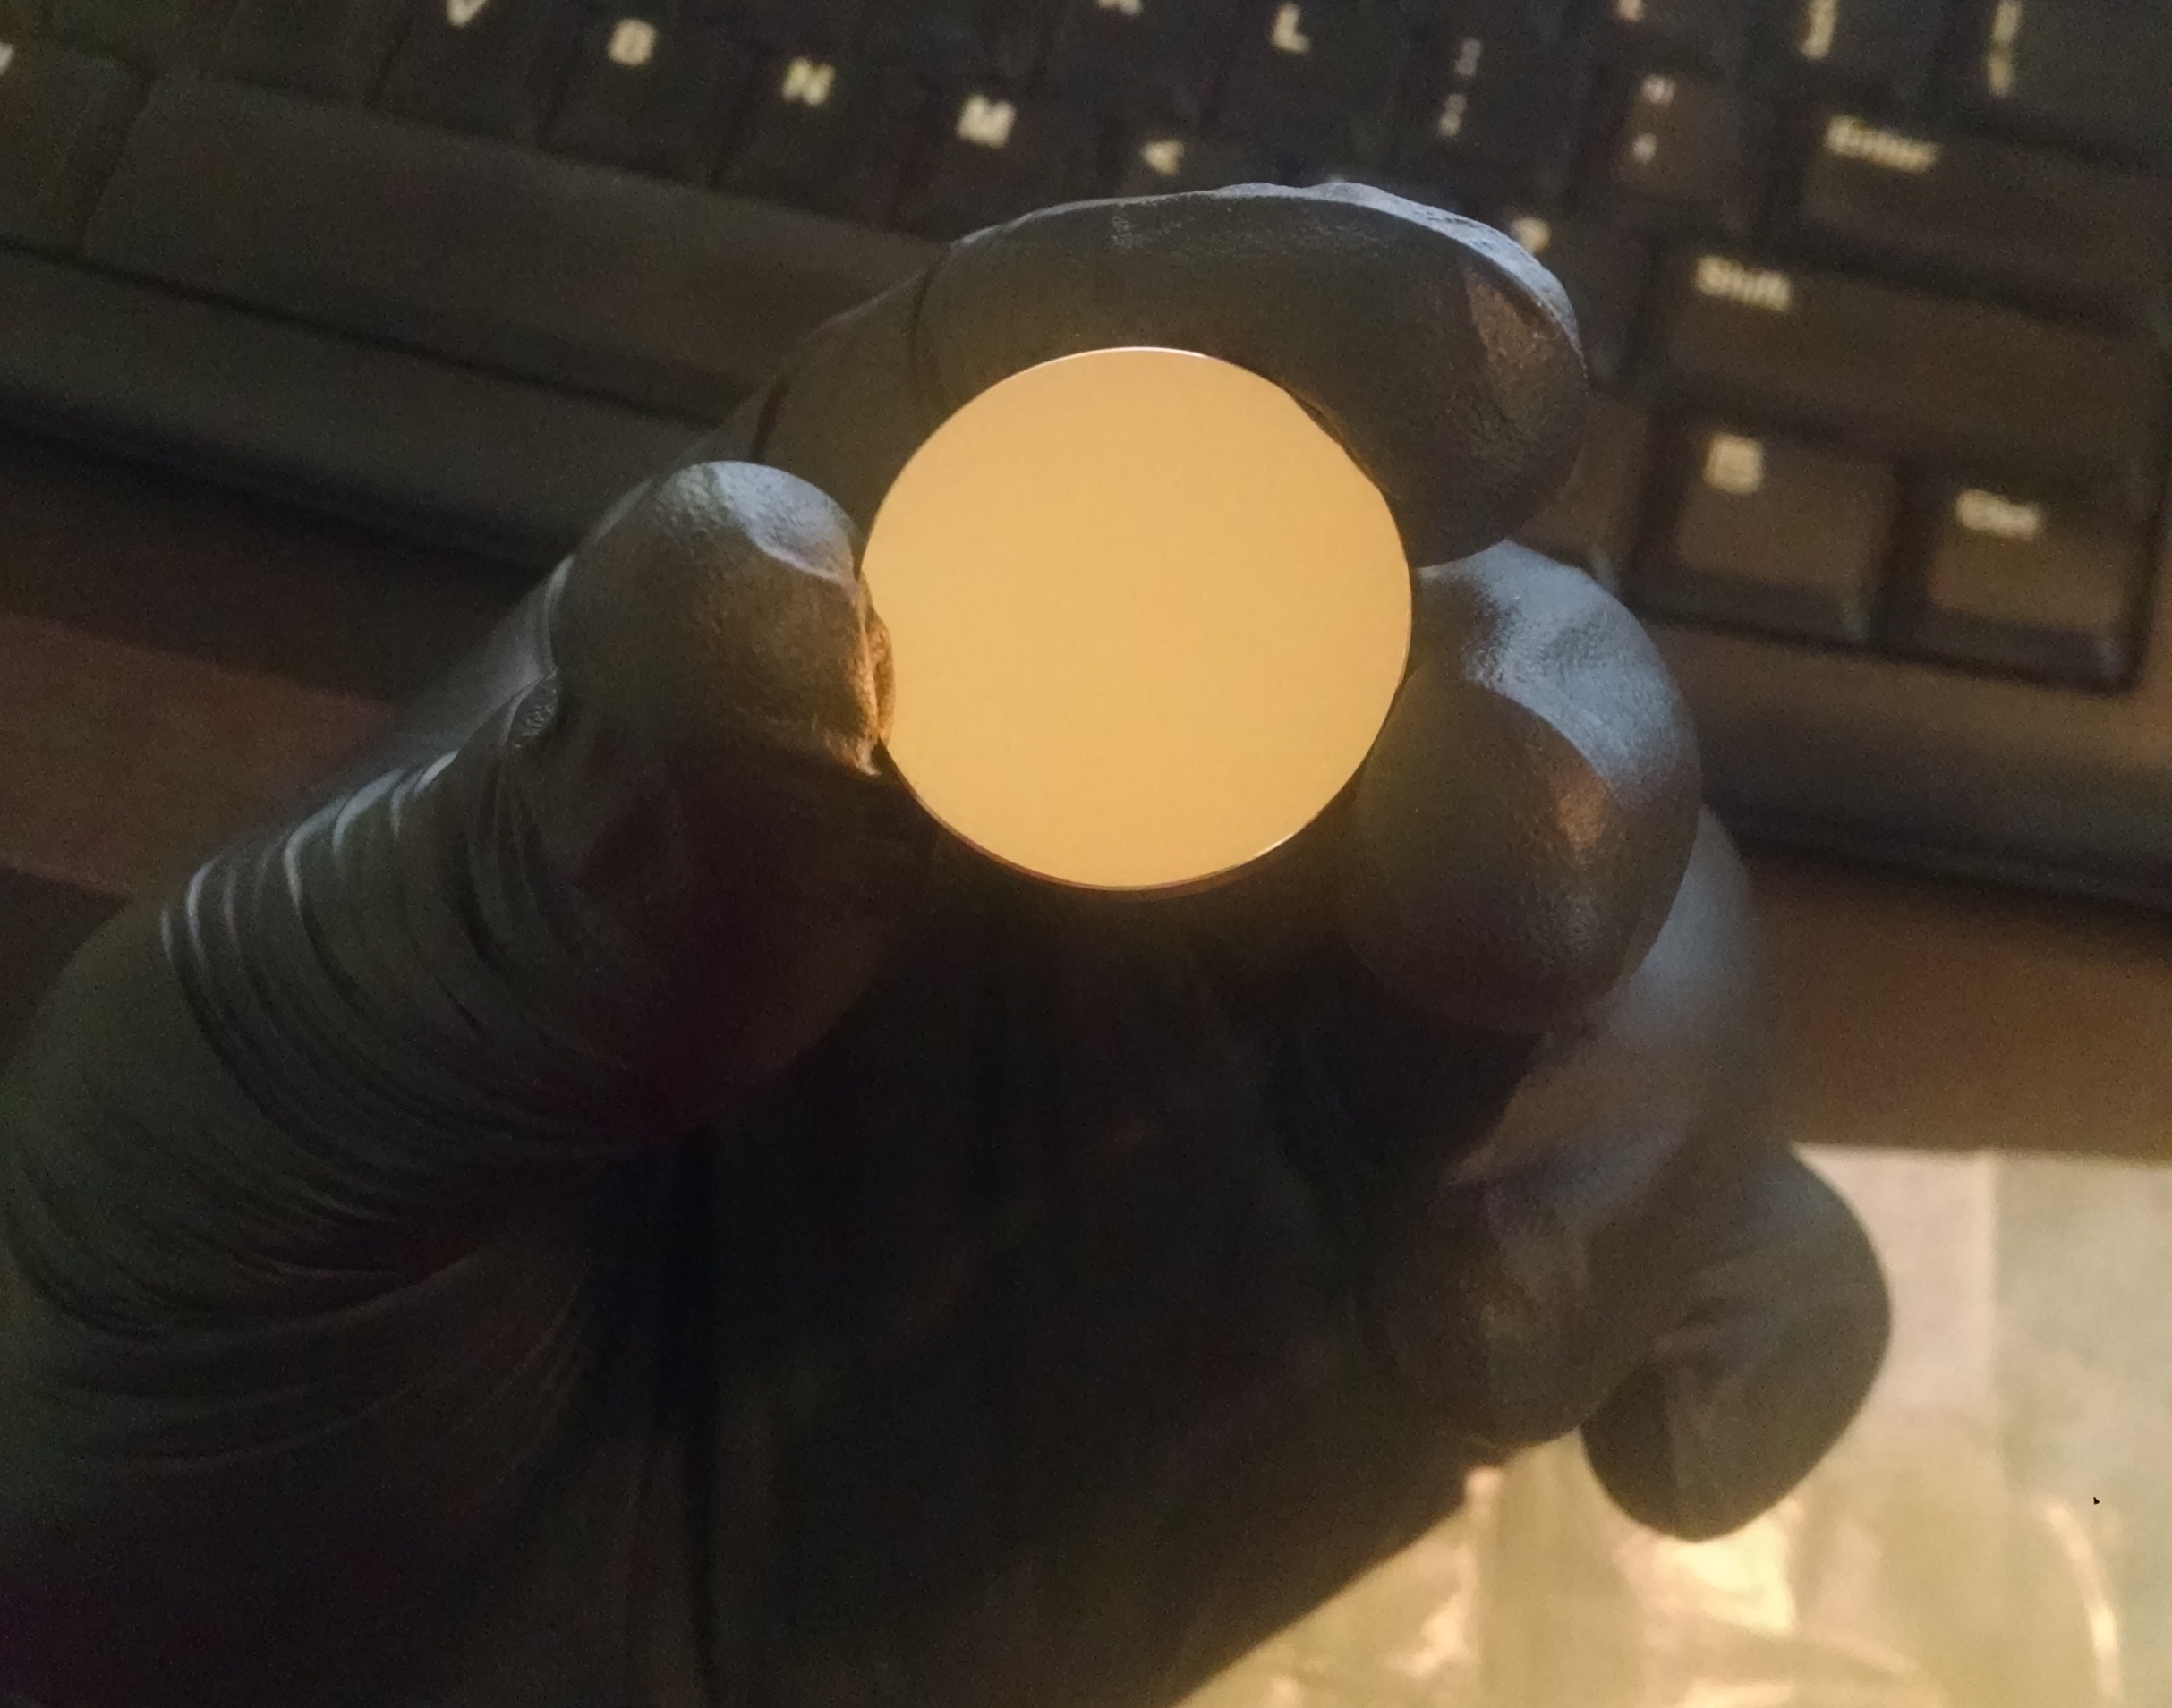
This is one of the beautiful gold first surface mirrors for the optics. Makes me feel like I’ve got a miniature Webb space telescope. You need these fancy mirrors since the laser will blast through most any normal mirror. People have also had success using hard drive platters since they’re super polished. These came with my kinematic mounts and optical head. The kinematic mounts have two screws to angle the mirrors in two directions. The way I’m attaching them lets me slide them in multiple directions for adjustment and alignment.
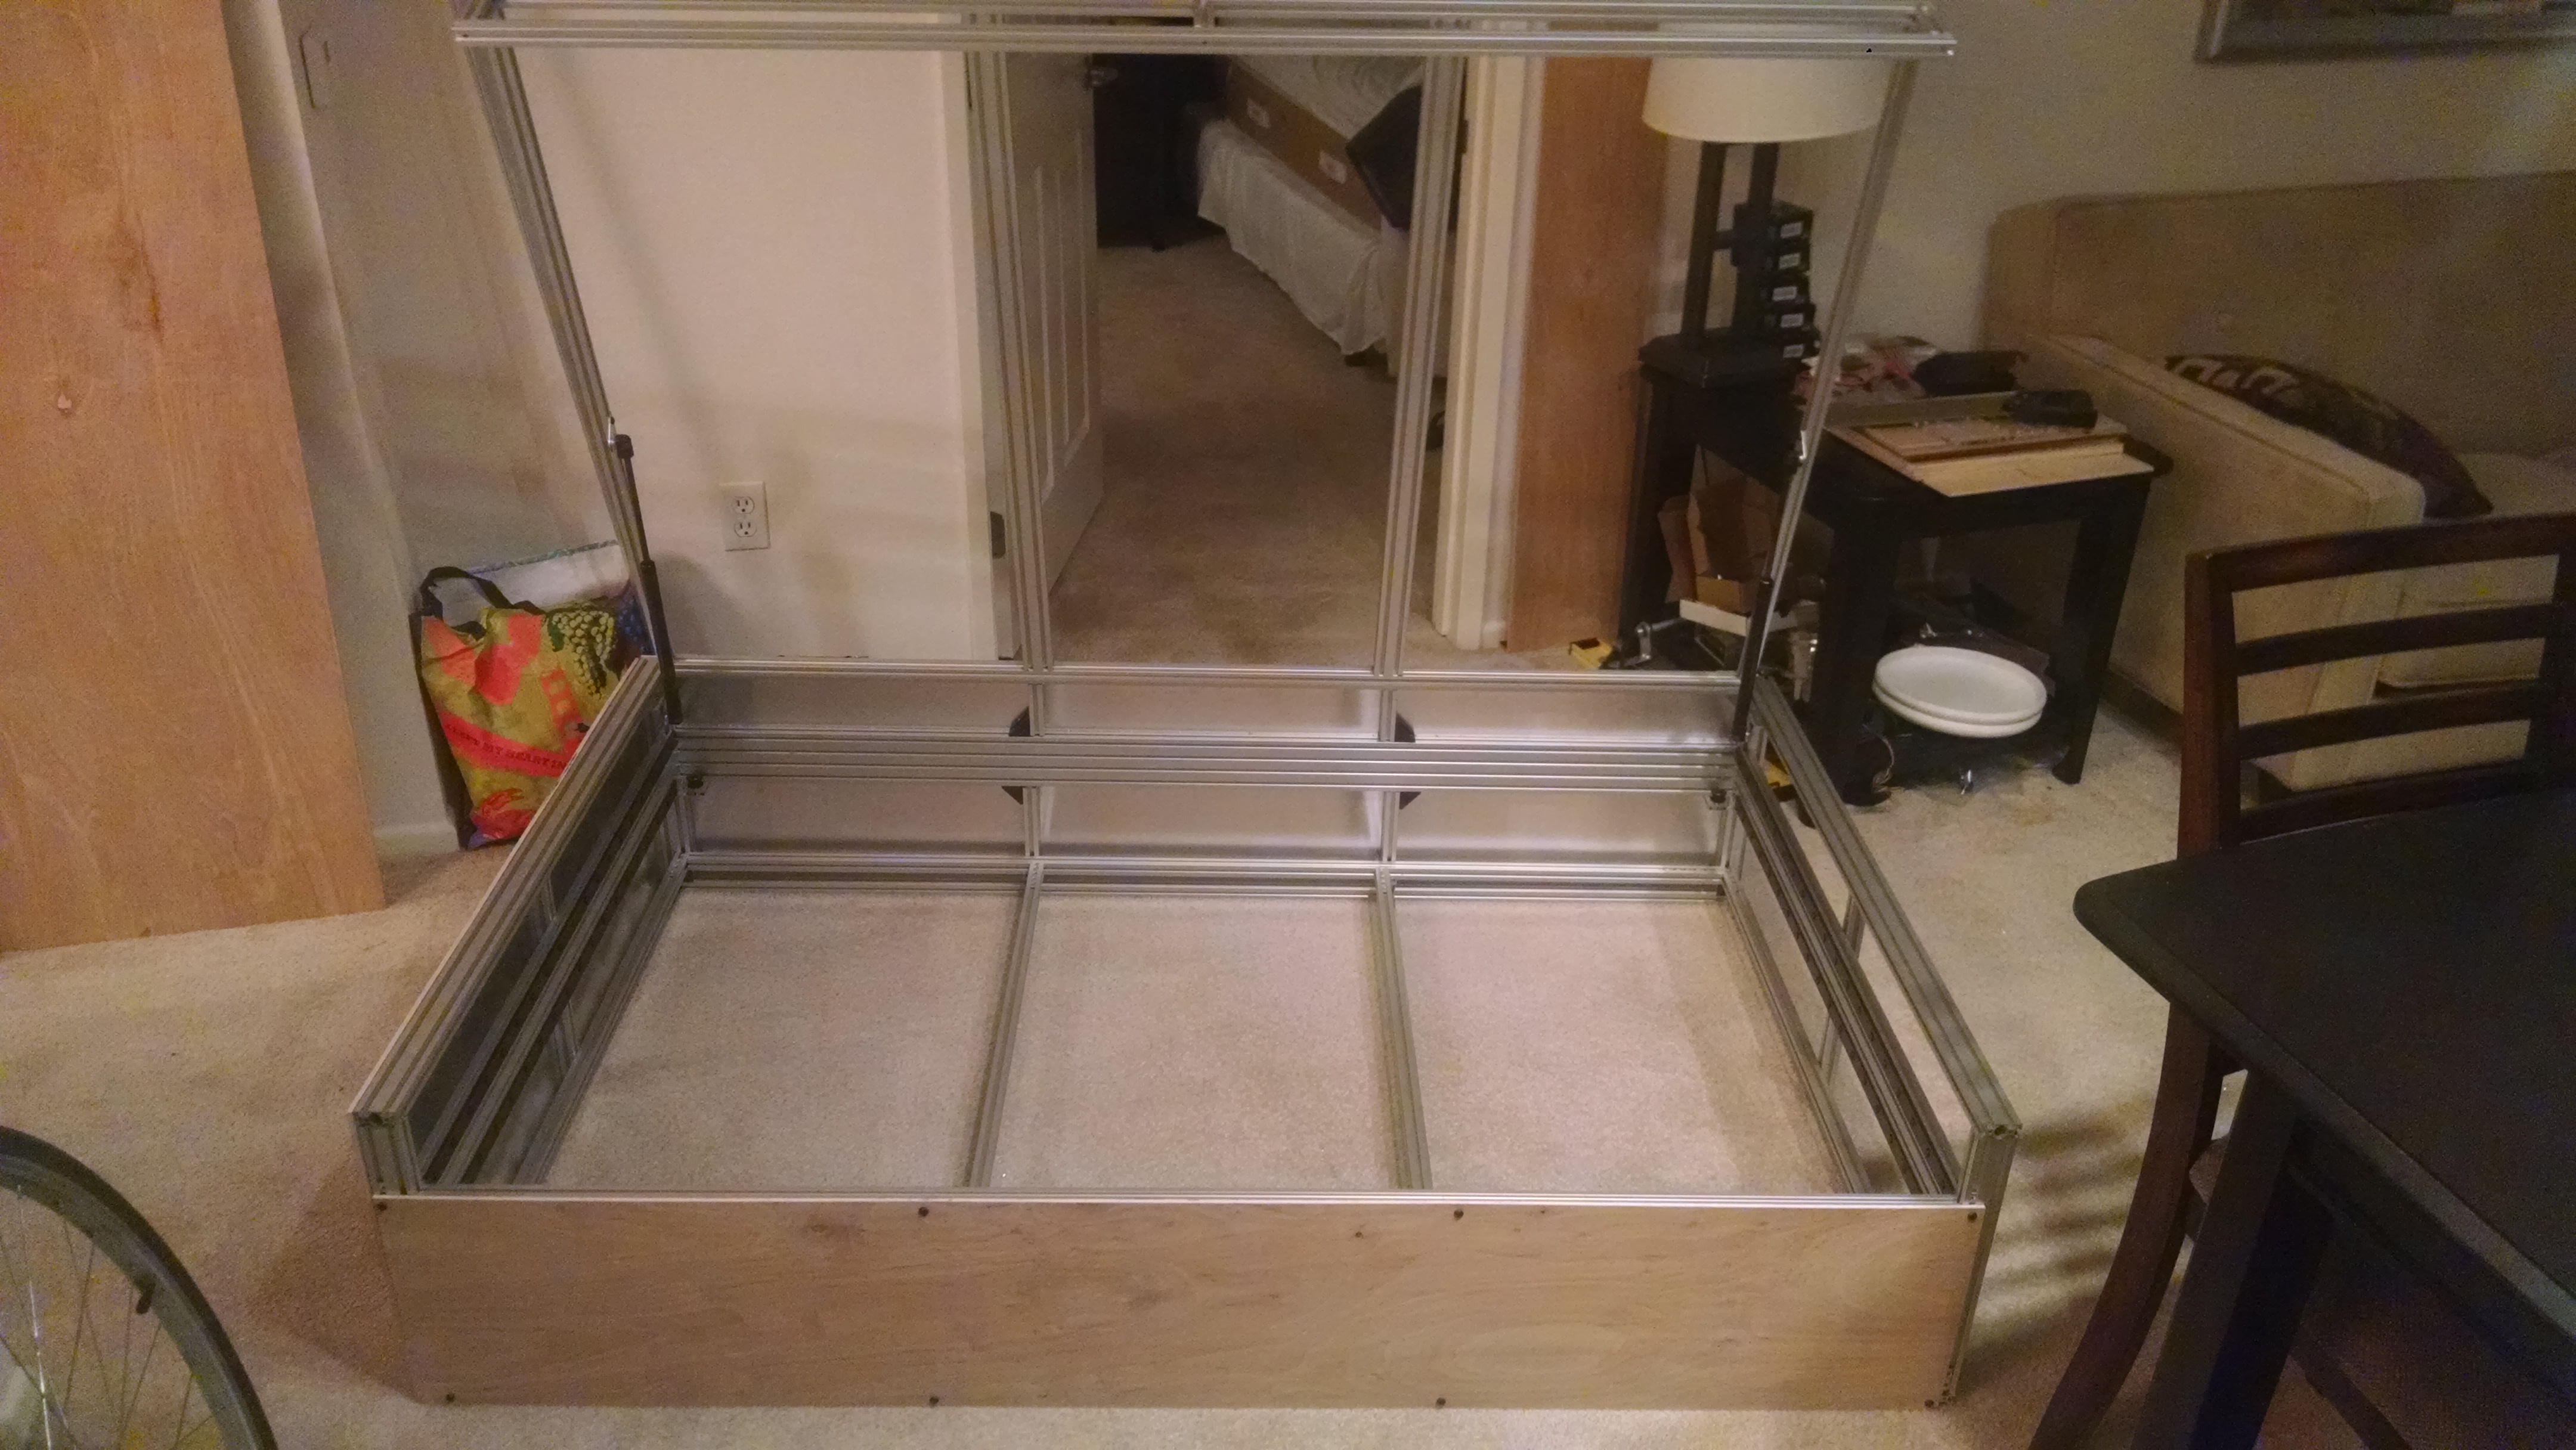
I also splurged and set up the lid with gas springs to hold it open, As well as some shiny Ikea cabinet handles. Really adds to the sexiness factor.
The interior should be well lit for lining things up and seeing what’s going on. I fit some 12v LED strips inside the extrusions of the lid to light it up from above.
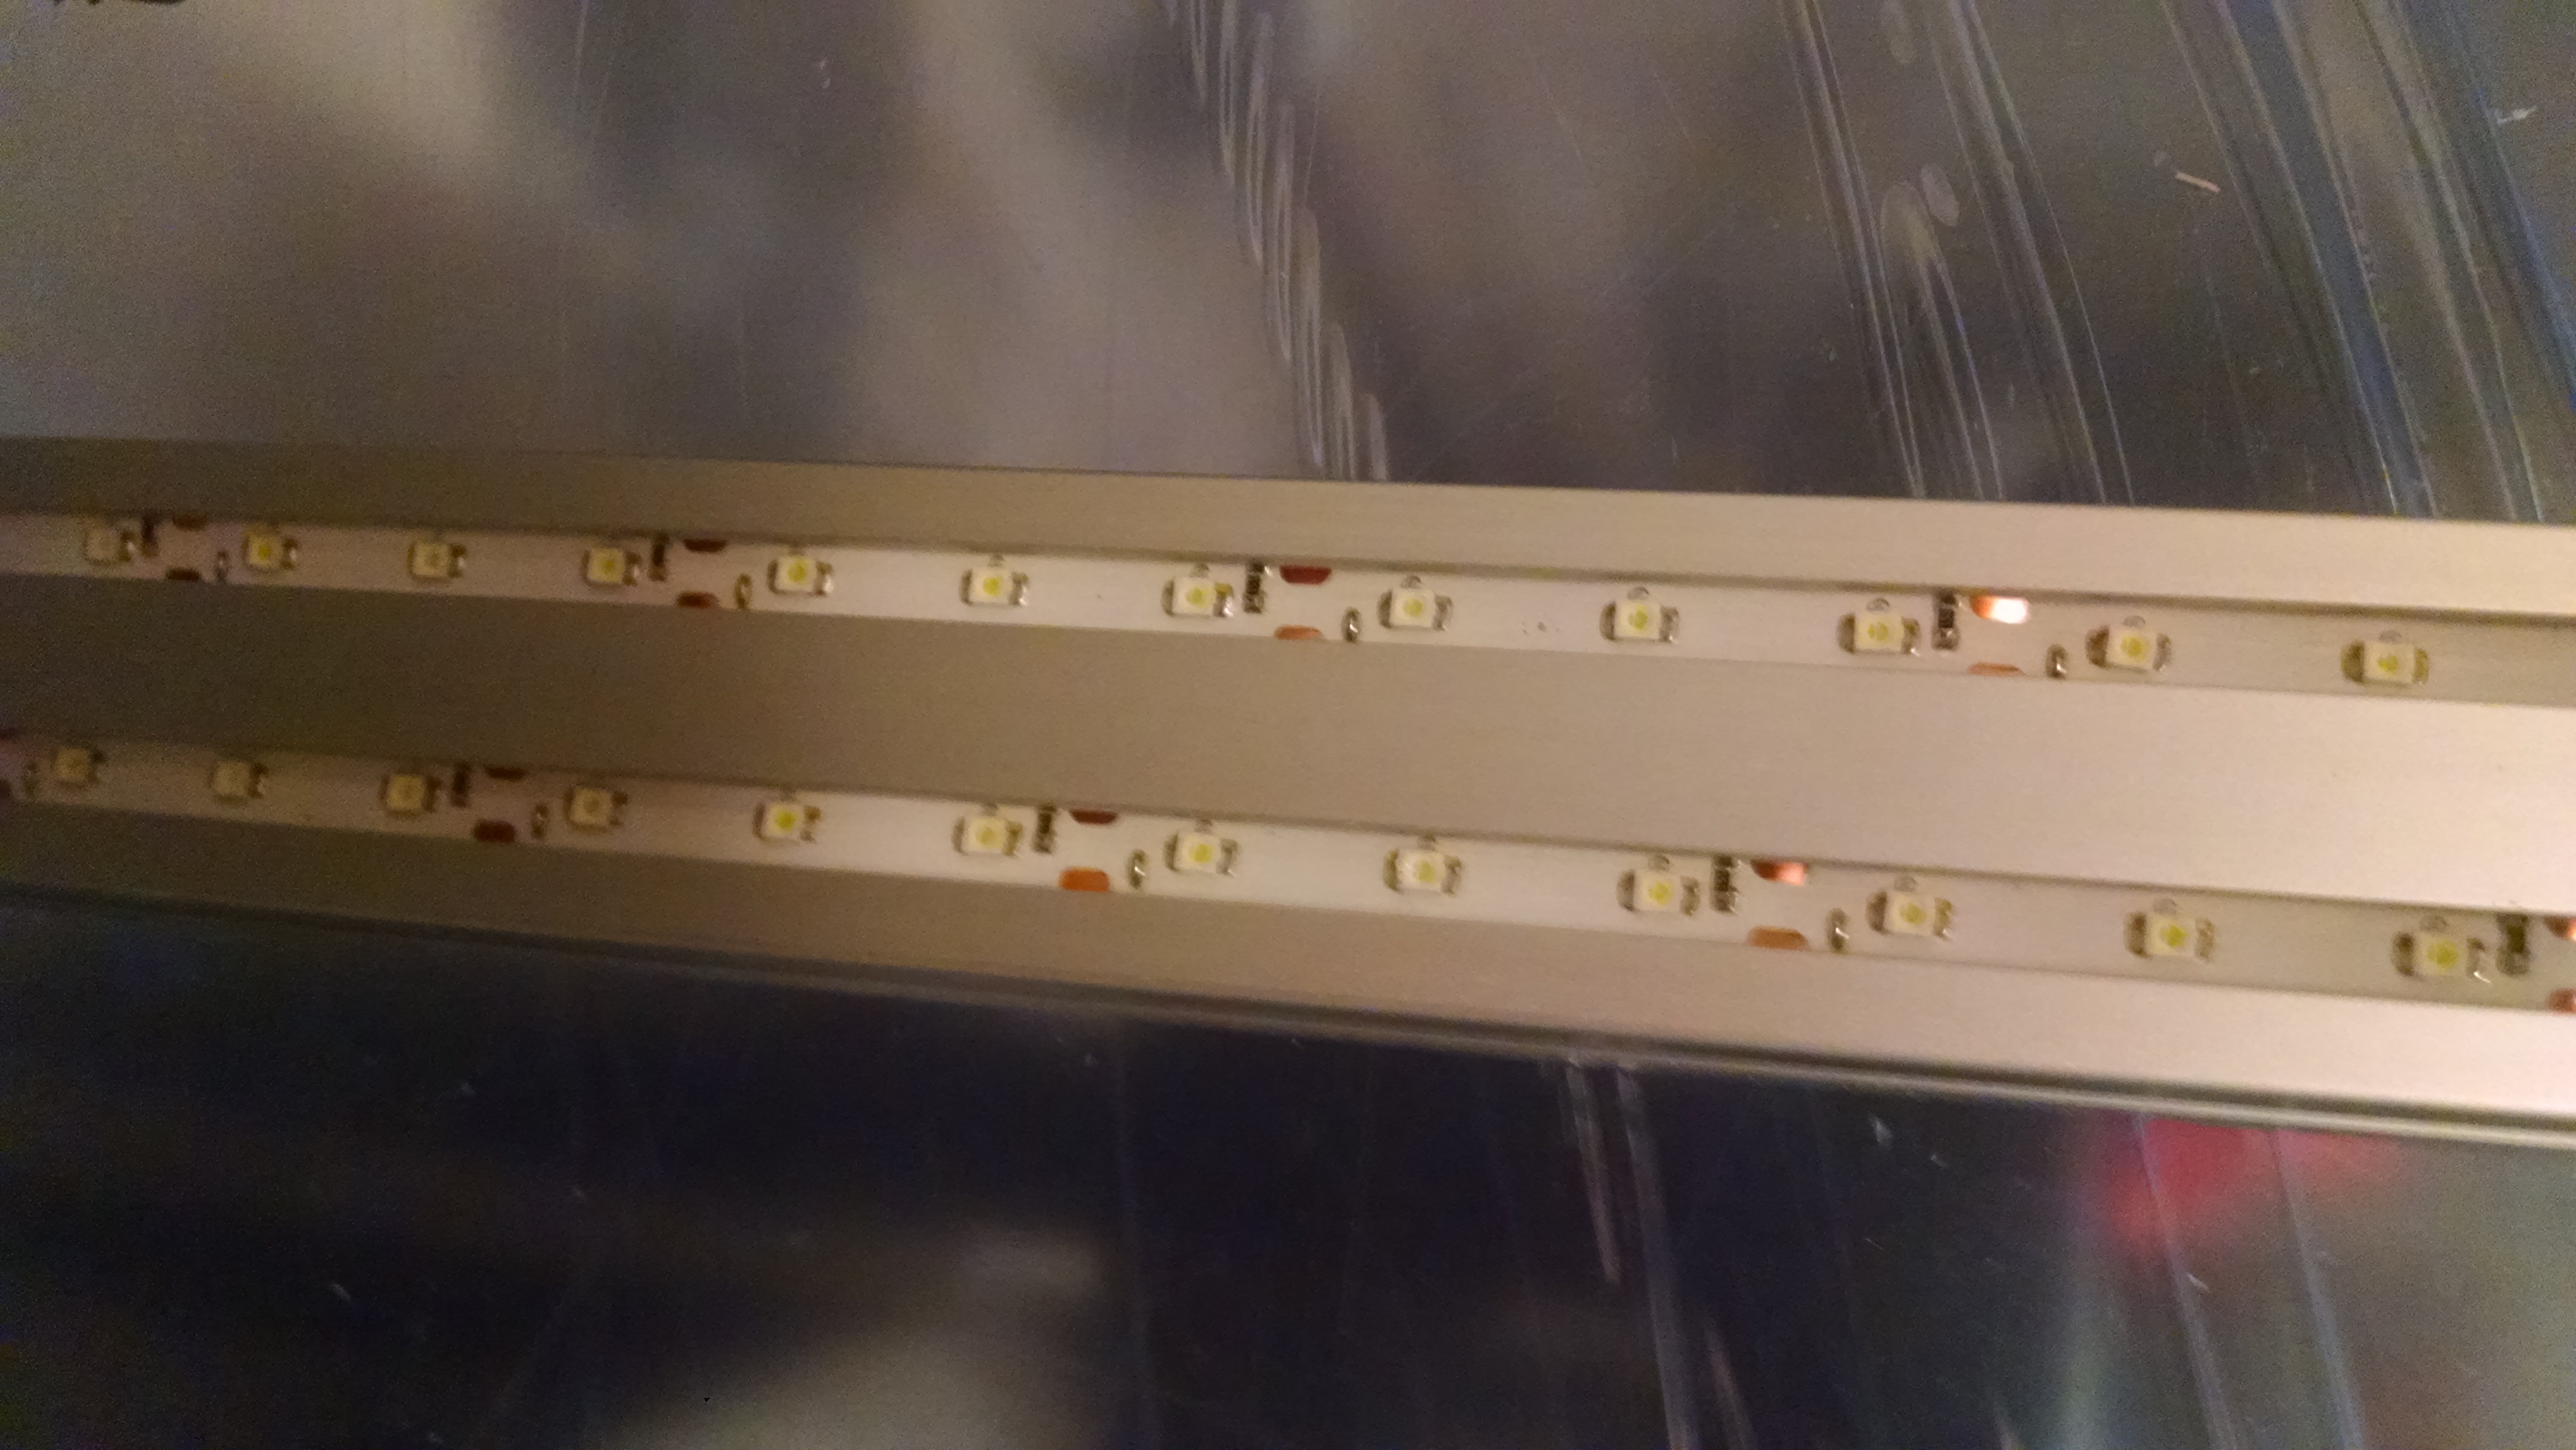
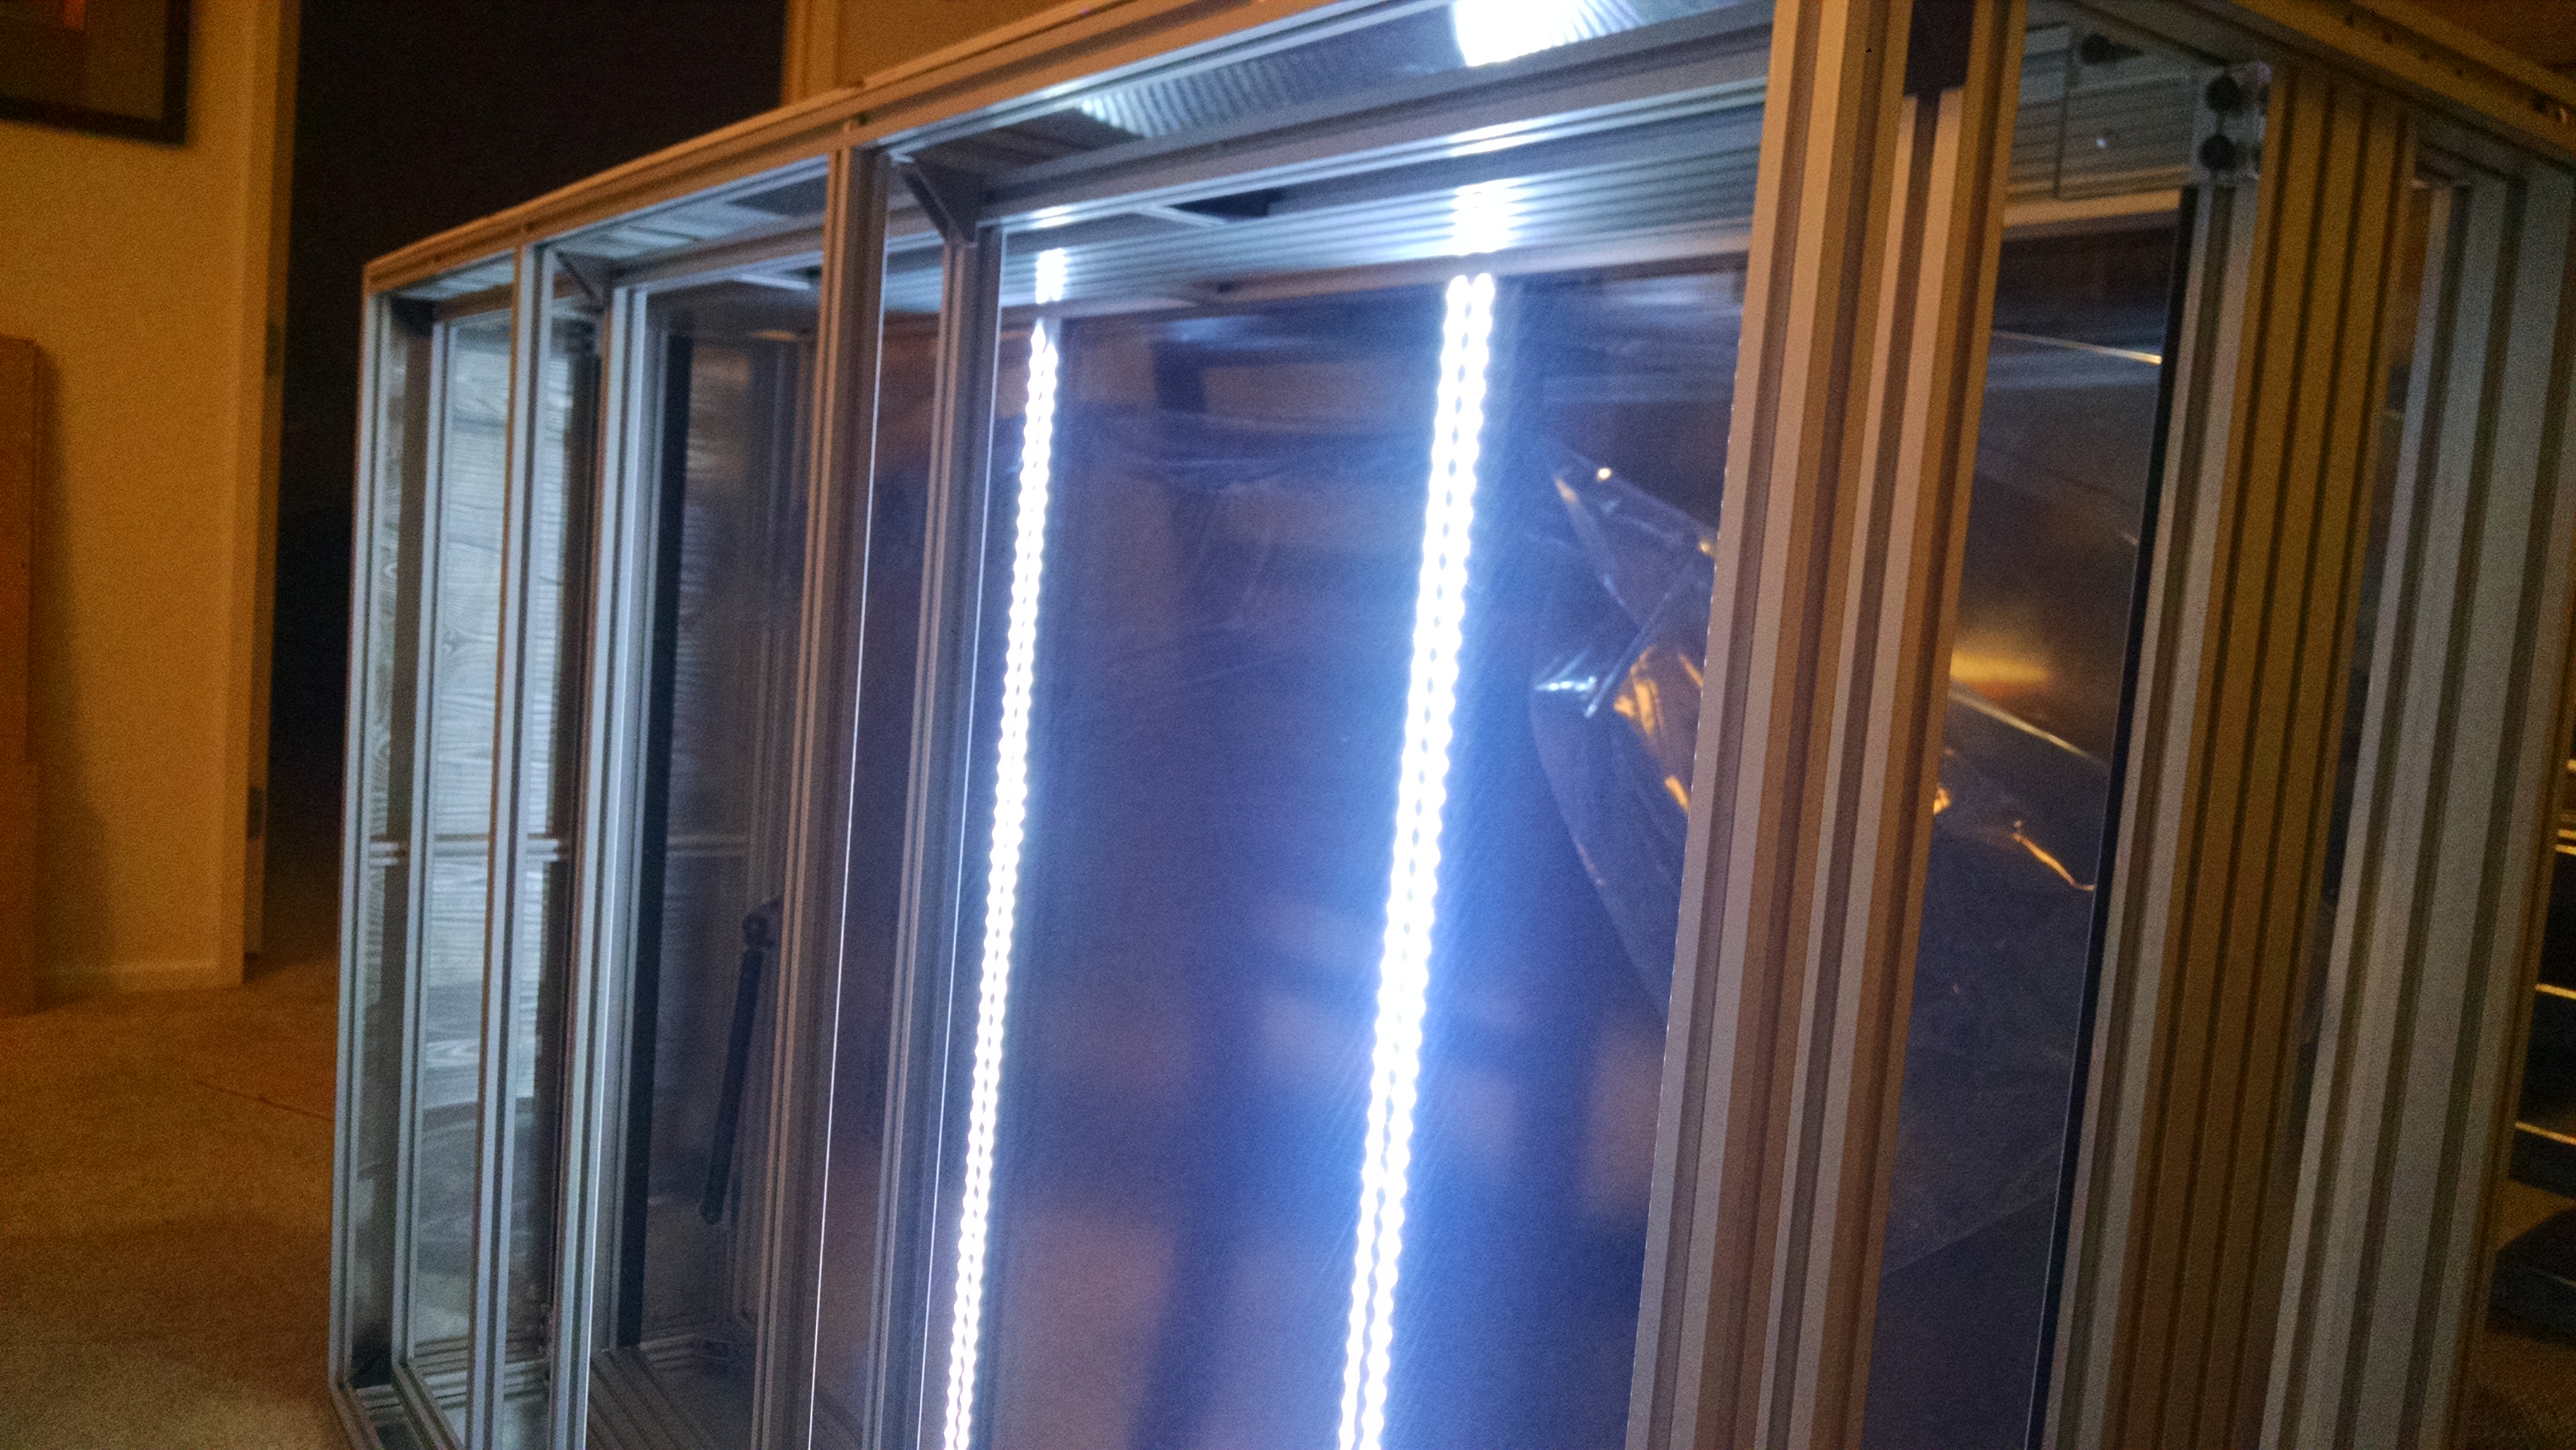
The plan was to stick the LEDs to the underside of these extrusions since they’re adhesive backed. I found that some reviewers on Amazon said they didn’t stick very well, which was a concern, till I realized they can be perfectly stuffed into the HFS5 slots! They stay in place, no adhesive required.
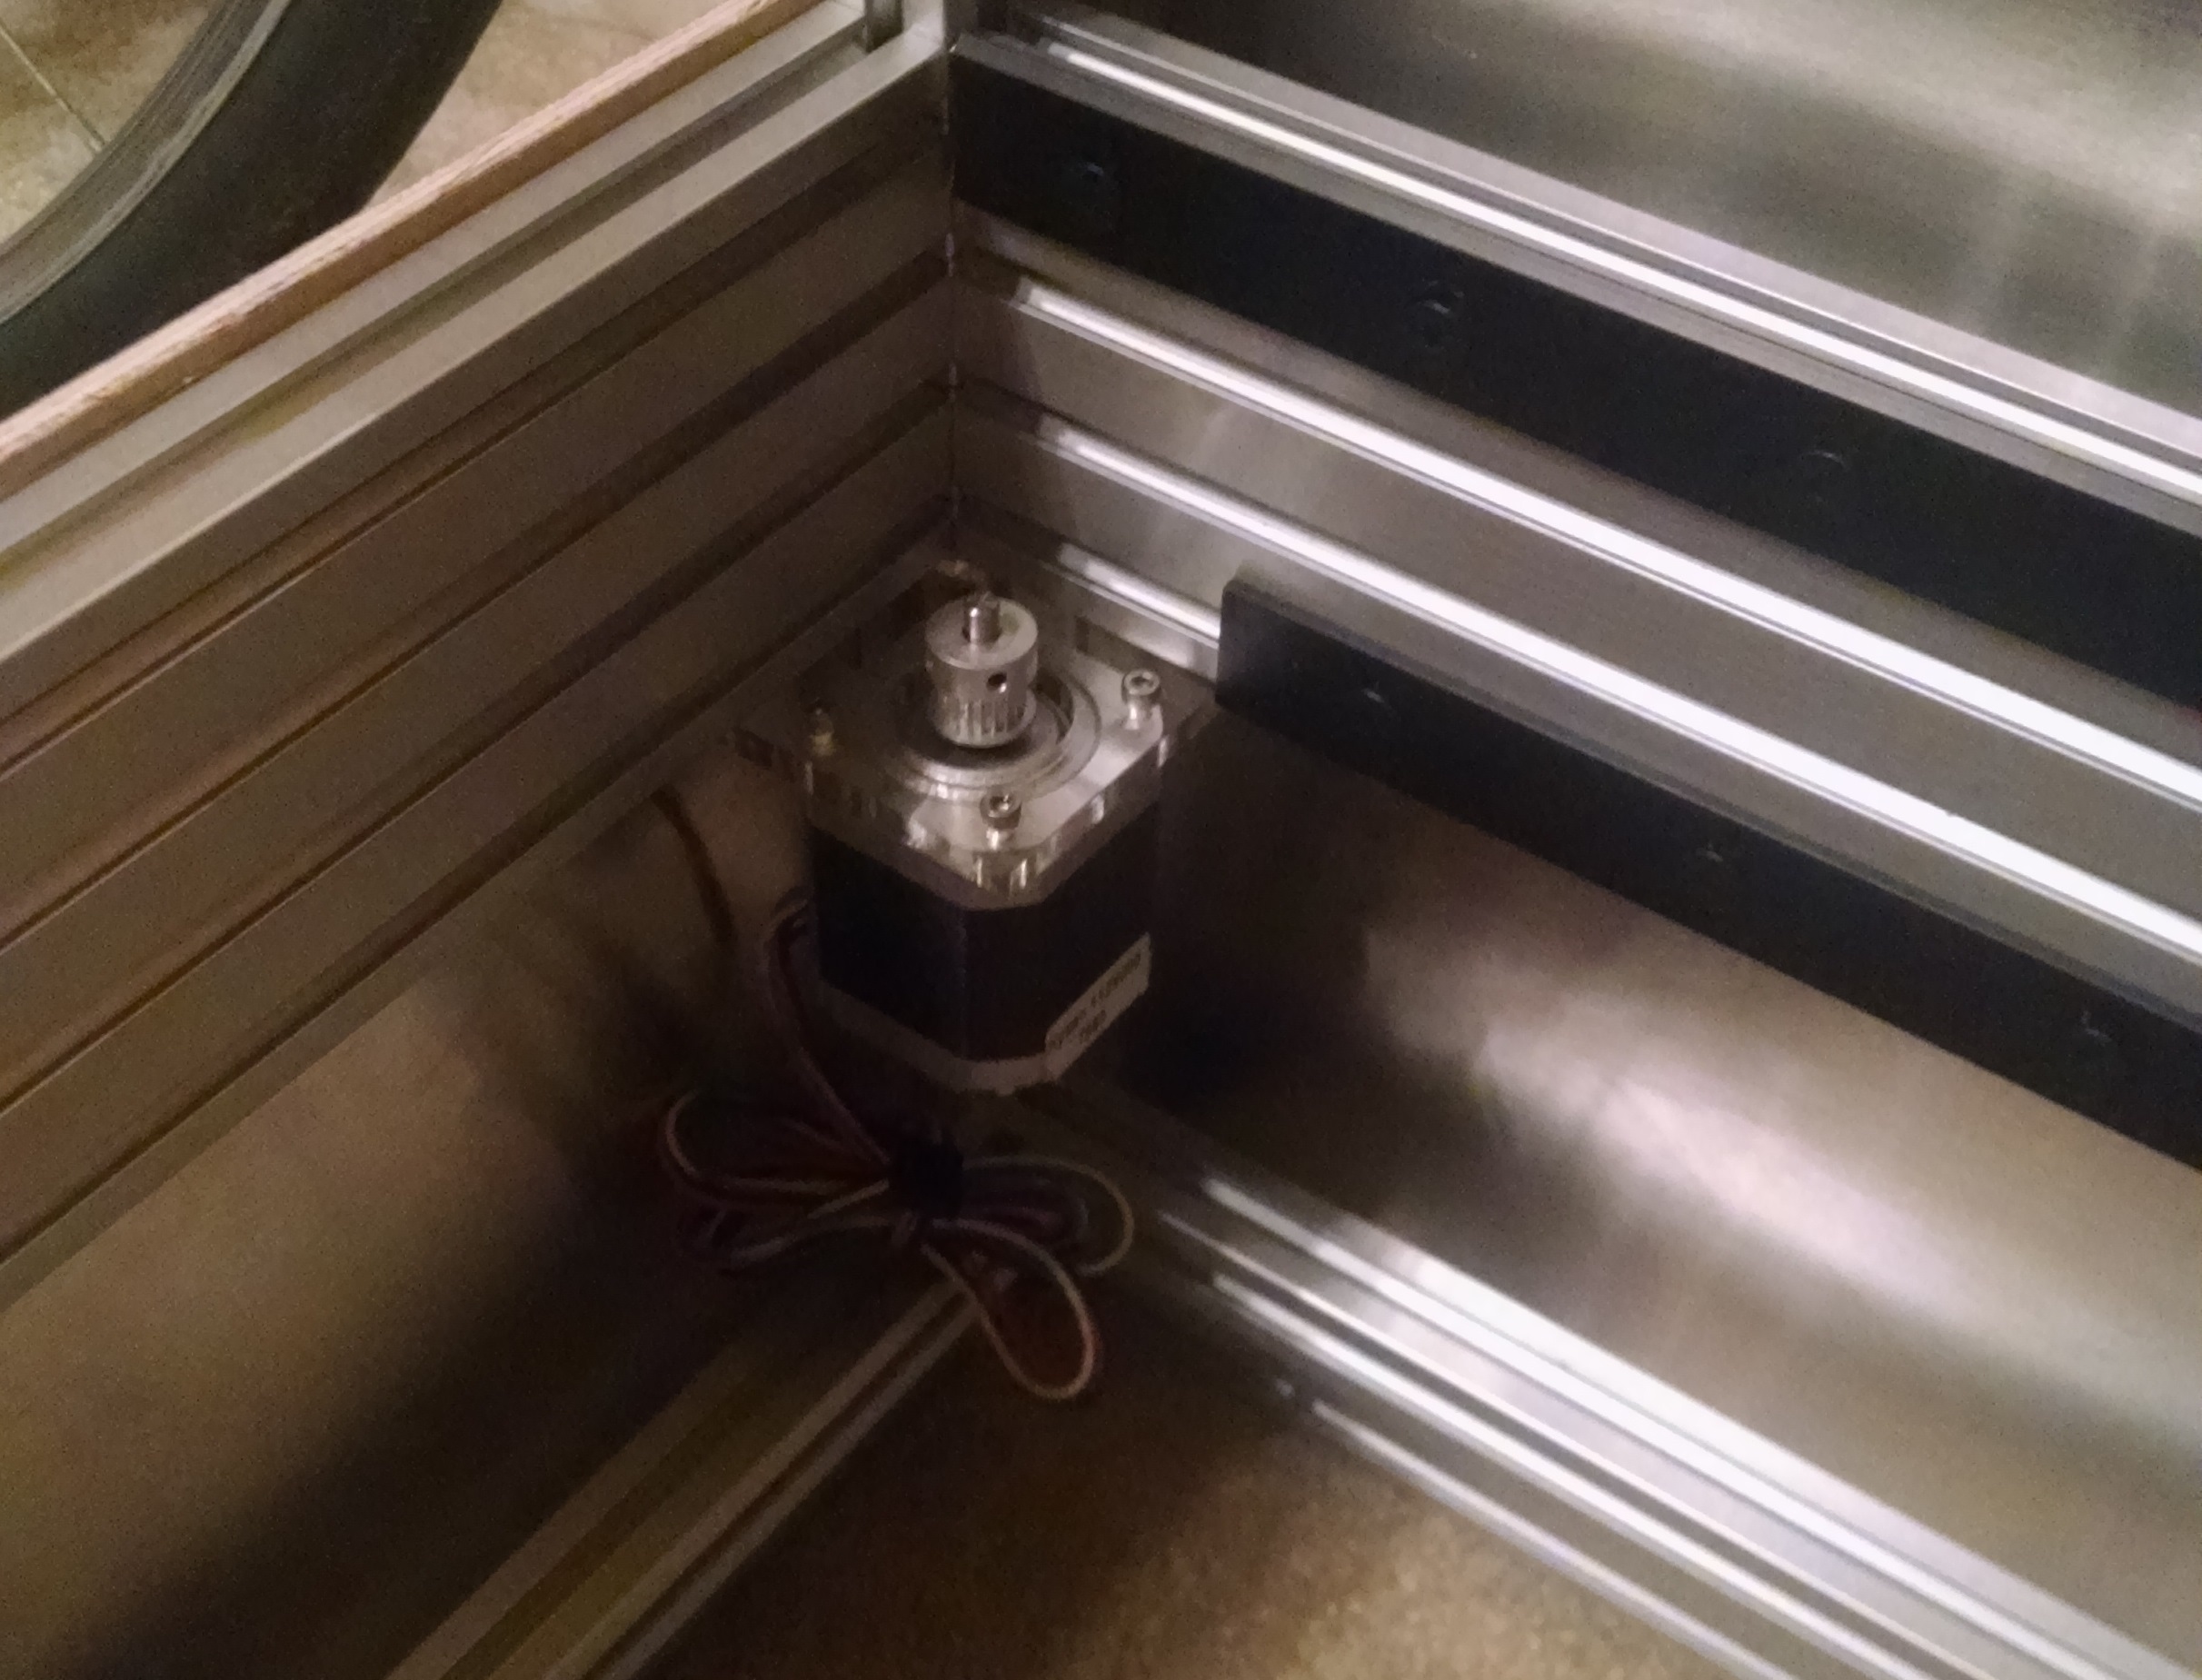
This is a picture of one of the y axis stepper motor mounts. The mounts are cut out of acrylic from Ponoko. That was the first time I used Ponoko and they were actually very reasonable on price and a quick turn around. If I wasn’t building my own laser, I’d definitely use them again.
There are several other lasercut plates on the gantry mounting the x motor and holding everything together. You can also see the rails in this picture. I’m using delrin V wheels from Openbuilds as well as their V rails. It’s a very smooth and low friction linear slide method and I’m pleasantly surprised by how rigid they are.
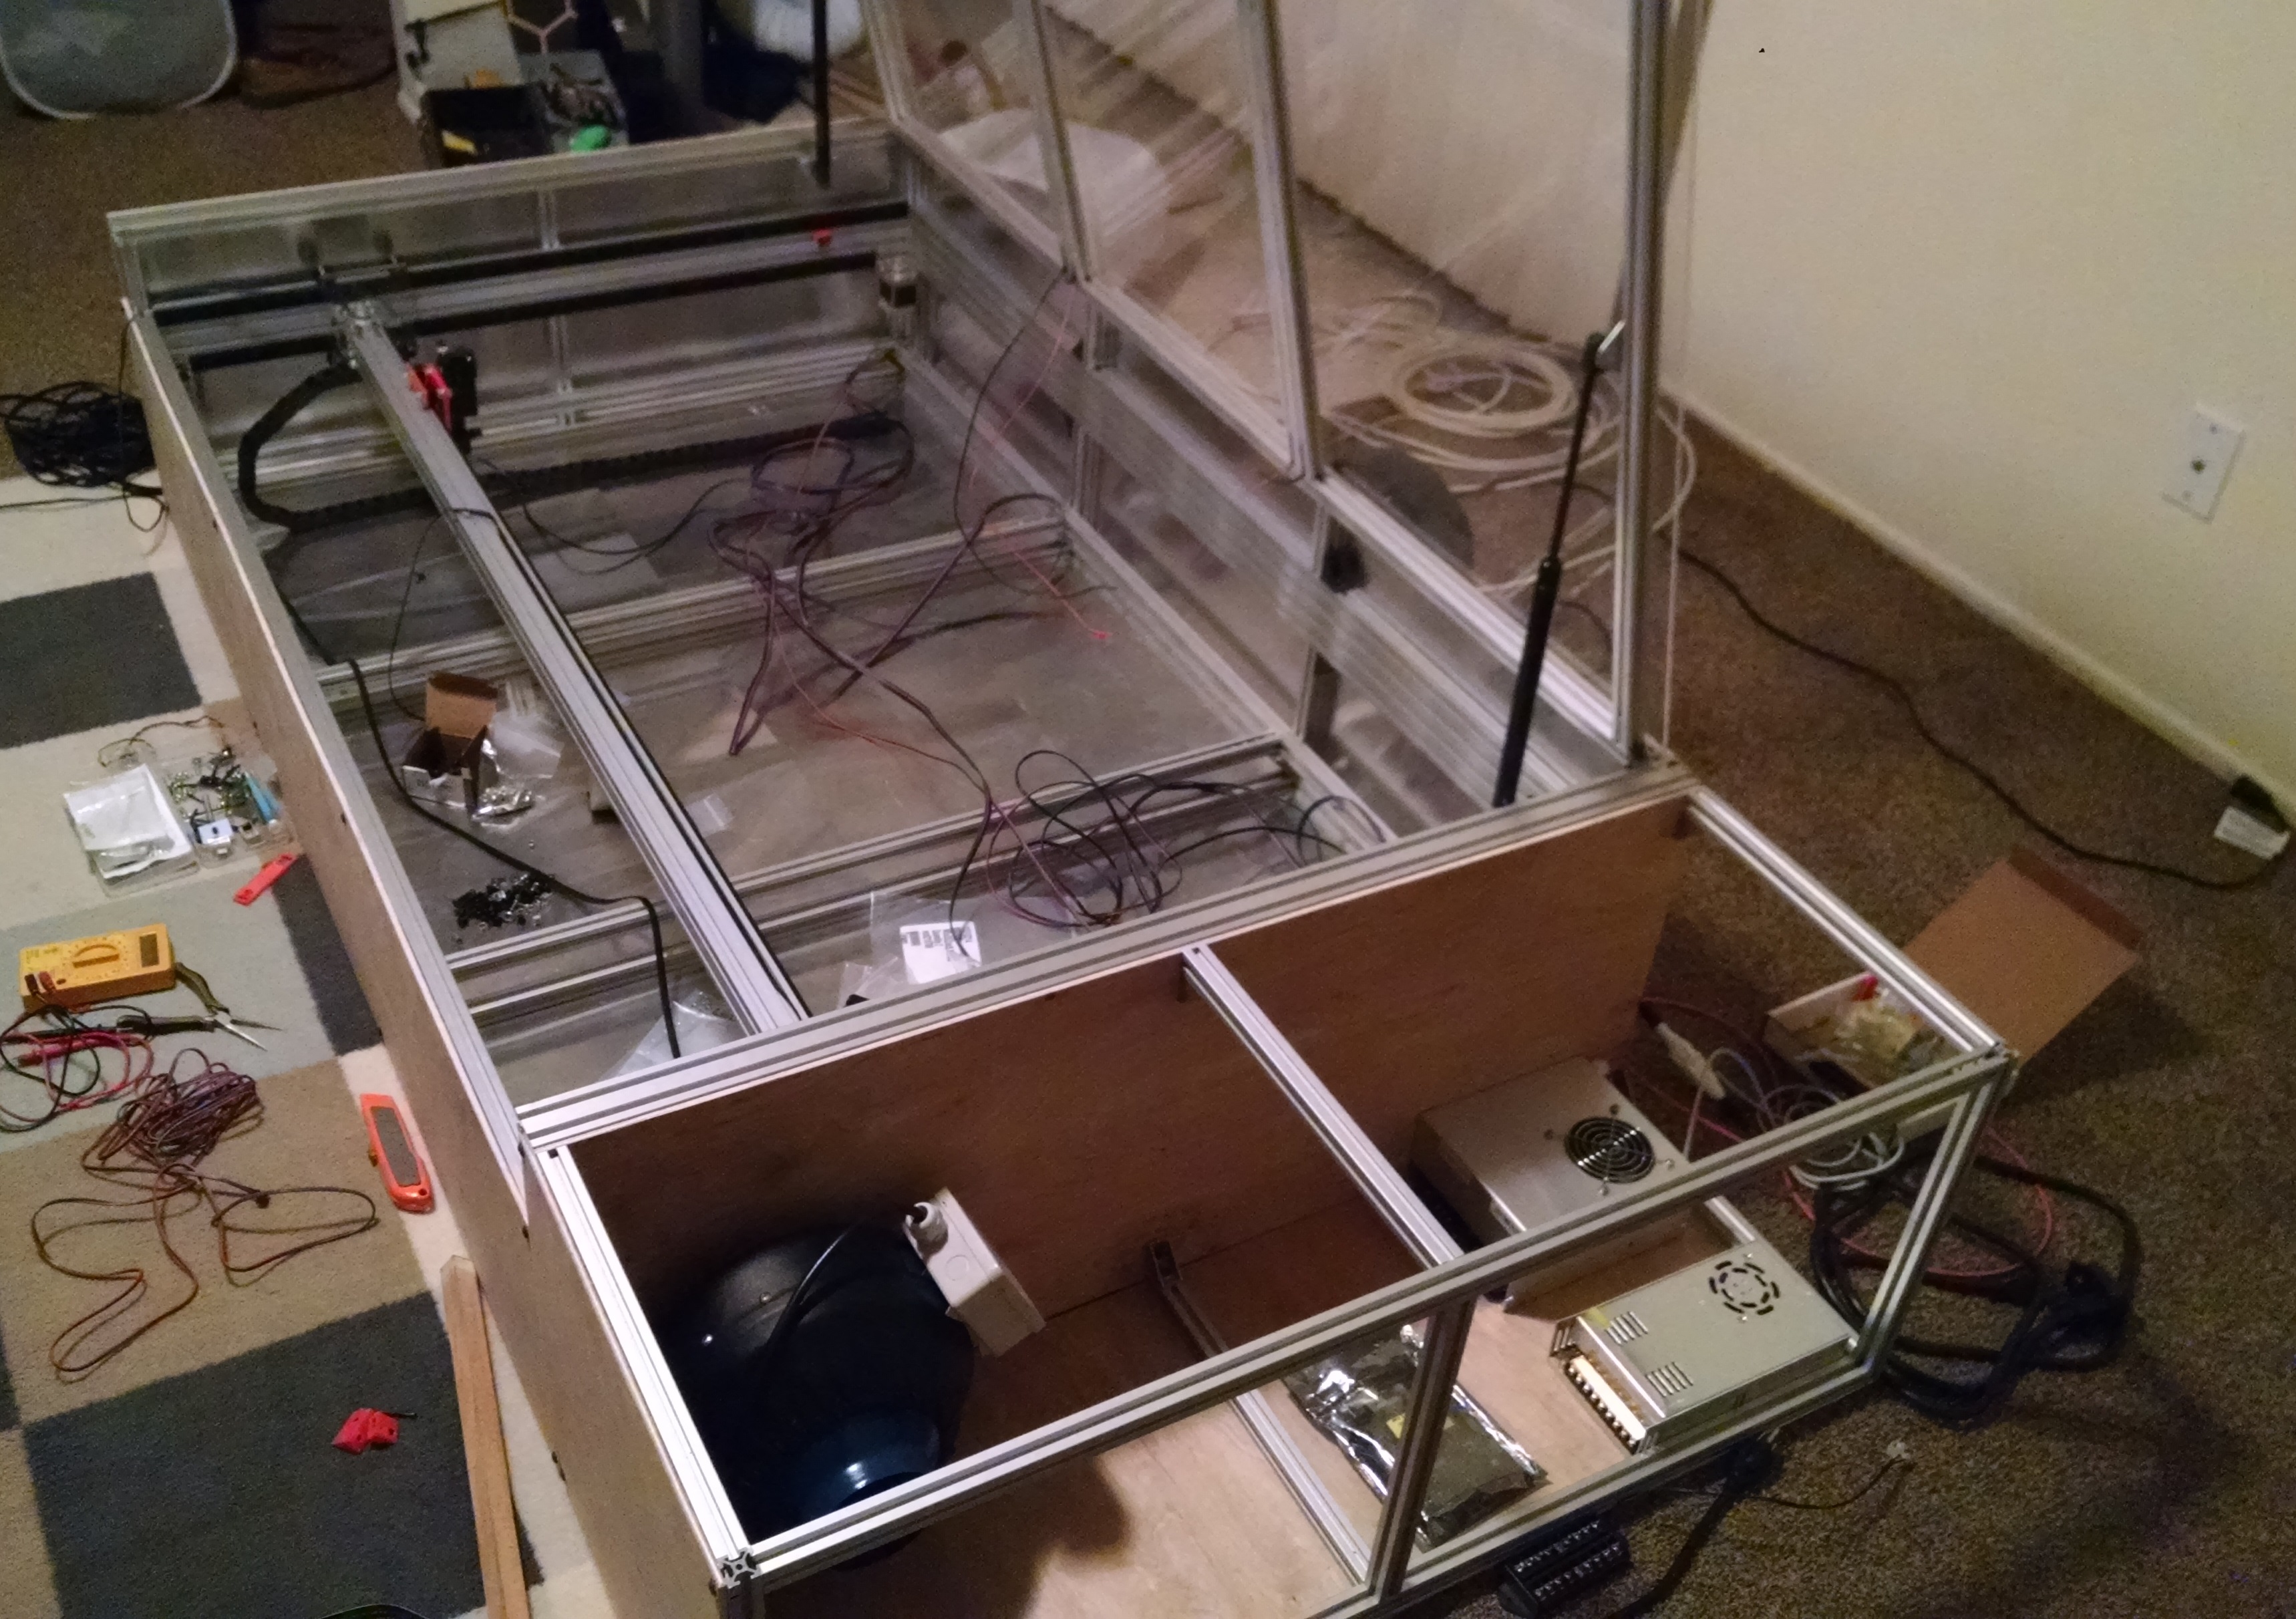
So this is the state of the union right now- wiring. I’m figuring out how to hook this all up right now, along with the control panel. Theirs a ventilation fan, LEDs, cooling pump, air assist pump, laser PSU, motion control PSU, as well as the smoothieboard to be hooked up. It’s quite daunting, but I’ve been working on it on and off now that school is back in session. More updates to come!
DominicDoty.com and all work shown in it is licensed under a Creative Commons Attribution-NonCommercial-ShareAlike 4.0 International License.